Creating box plot charts
Where possible, use qlik-embed and qlik/api rather than this framework.
This section describes how to create box plots with the Visualization API.
Creating a basic box plot
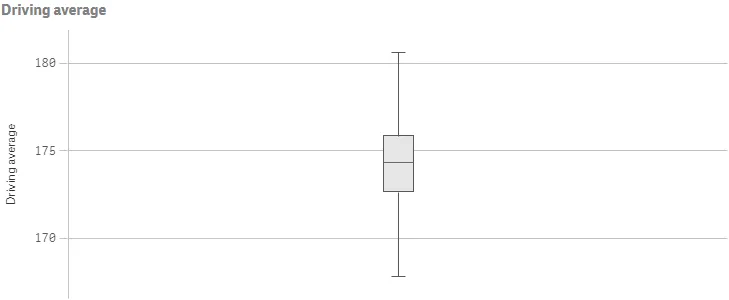
In this example, you want to create a basic box plot, containing one dimension and one measure, and with a custom title.
-
Create the chart.
Create the container for the chart. The visualization type is
boxplot.Visualization API
app.visualization.create('boxplot',[],{}) -
Define the dimension and the measure as columns.
[{"qDef": {"qFieldDefs": ["Date.autoCalendar.Year"],"qFieldLabels": ["Year"]}},{"qDef": {"qLabel": "Driving average","qDef": "Avg({<Par={'4','5'}>}DrDist)"}}] -
Define the title in the options
{"showTitles": true,"title": "Driving average"}
Result

Complete code examples: Basic box plot
-
Visualization API
const config = {host: '<TENANT_URL>', //for example, 'abc.us.example.com'prefix: '/',port: 443,isSecure: true,webIntegrationId: '<WEB_INTEGRATION_ID>'};require.config({baseUrl: `https://${config.host}/resources`,webIntegrationId: config.webIntegrationId});require(["js/qlik"], (qlik) => {qlik.on('error', (error) => console.error(error));const app = qlik.openApp('<APP_ID>', config);app.visualization.create('boxplot',[{"qDef": {"qFieldDefs": ["Date.autoCalendar.Year"],"qFieldLabels": ["Year"]}},{"qDef": {"qLabel": "Driving average","qDef": "Avg({<Par={'4','5'}>}DrDist)"}}],{"showTitles": true,"title": "Driving average"}).then((vis)=>{vis.show("QV01");});});
Calculation presets and presentation
The box plot elements are configured in the options within the boxplotDef. You
can select to use one of three calculation preset modes:
- tukey
- fractiles
- stdDev
-
Set the preset mode.
In this example, you will select to use the Standard deviation preset with two standard deviations.
"boxplotDef": {/*Standard deviation preset*/"calculations": {"auto": true,"mode": "stdDev","parameters": {"stdDev": 3}}} -
Show whiskers.
Enable ticks at the end of each whisker:
"presentation": {"whiskers": {"show": true}}."boxplotDef": {/*Standard deviation preset*/"calculations": {"auto": true,"mode": "stdDev","parameters": {"stdDev": 3}},/*Show whiskers*/"presentation": {"whiskers": {"show": true}}} -
Define the orientation.
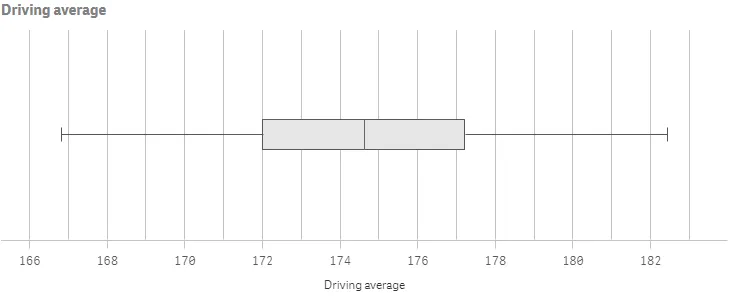
You might also want to change the way the box plot is presented by changing to horizontal orientation.
"orientation": "horizontal" -
Define grid line spacing.
This example also uses narrow grid line spacing.
"orientation": "horizontal","gridlines": {"auto": false,"spacing": 3}
Result

Complete code example: Calculation presets and presentation
-
Visualization API
const config = {host: '<TENANT_URL>', //for example, 'abc.us.example.com'prefix: '/',port: 443,isSecure: true,webIntegrationId: '<WEB_INTEGRATION_ID>'};require.config({baseUrl: `https://${config.host}/resources`,webIntegrationId: config.webIntegrationId});require(["js/qlik"], (qlik) => {qlik.on('error', (error) => console.error(error));const app = qlik.openApp('<APP_ID>', config);app.visualization.create('boxplot',[{"qDef": {"qFieldDefs": ["Date.autoCalendar.Year"],"qFieldLabels": ["Year"]}},{"qDef": {"qLabel": "Driving average","qDef": "Avg({<Par={'4','5'}>}DrDist)"}}],{"boxplotDef": {"calculations": {"auto": true,"mode": "stdDev","parameters": {"stdDev": 3}},"presentation": {"whiskers": {"show": true}}},"showTitles": true,"title": "Driving average","orientation": "horizontal","gridlines": {"auto": false,"spacing": 3}}).then((vis)=>{vis.show("QV01");});});
Color settings
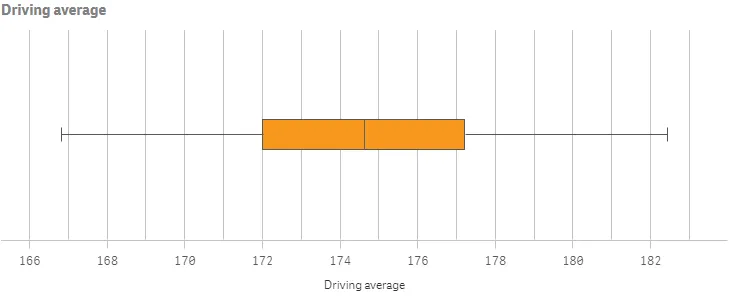
In this example, you will add custom colors to the box and the points.
-
Box color Box color settings are specified in the color object within the
boxplotDef."color": {/*Box color*/"box": {"paletteColor": {"index": 9,"color": "#f8981d"}}} -
Define point / outlier color.
Point, or outlier, color settings are also specified in the color object within the
boxplotDef."color": {/*Box color*/"box": {"paletteColor": {"index": 9,"color": "#f8981d"}},/*Outlier color*/"point": {"paletteColor": {"index": -1,"color": "#214152"}}}
Result

Complete code example: Color settings
-
Visualization API
const config = {host: '<TENANT_URL>', //for example, 'abc.us.example.com'prefix: '/',port: 443,isSecure: true,webIntegrationId: '<WEB_INTEGRATION_ID>'};require.config({baseUrl: `https://${config.host}/resources`,webIntegrationId: config.webIntegrationId});require(["js/qlik"], (qlik) => {qlik.on('error', (error) => console.error(error));const app = qlik.openApp('<APP_ID>', config);app.visualization.create('boxplot',[{"qDef": {"qFieldDefs": ["Date.autoCalendar.Year"],"qFieldLabels": ["Year"]}},{"qDef": {"qLabel": "Driving average","qDef": "Avg({<Par={'4','5'}>}DrDist)"}}],{"boxplotDef": {"calculations": {"auto": true,"mode": "stdDev","parameters": {"stdDev": 3}},"presentation": {"whiskers": {"show": true}},"color": {"auto": false,"box": {"paletteColor": {"index": 9}},"point": {"paletteColor": {"index": -1,"color": "#214152"}}}},"showTitles": true,"title": "Driving average","orientation": "horizontal","gridlines": {"auto": false,"spacing": 3}}).then((vis)=>{vis.show("QV01");});});
Using inner and outer dimensions
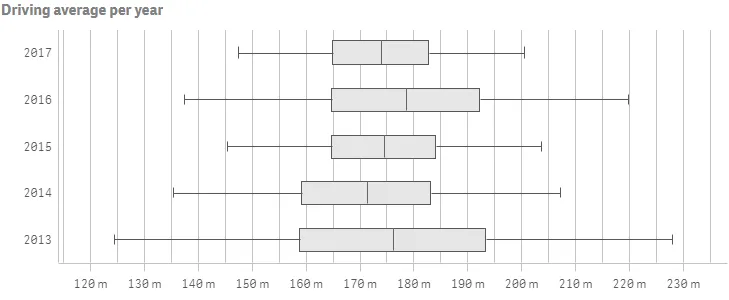
When creating box plots with a single dimension, you will receive a single box visualization. In this example, you will add a second dimension that will give you one box for each value of the second, or outer, dimension.
-
Adding the inner dimension.
This example uses
Dateas the inner dimension. Dimensions are defined as columns.{/*Inner dimension*/"qDef": {"qFieldDefs": ["Date.autoCalendar.Date"],"qFieldLabels": ["Date"]}} -
Adding the outer dimension.
This example uses
Yearas the outer dimension. Dimensions are defined as columns.{/*Inner dimension*/"qDef": {"qFieldDefs": ["Date.autoCalendar.Date"],"qFieldLabels": ["Date"]}},{/*Outer dimension*/"qDef": {"qFieldDefs": ["Date.autoCalendar.Year"],"qFieldLabels": ["Year"]}} -
Add the measure.
You then add a measure with some special number formatting. The measure to be used is average driving distance on par 4 and par 5 holes, which is added as a set statement. You define that the letter m (meaning meters) precedes the number on the measure axis.
{"qDef": {"qLabel": "Driving average","qDef": "Avg({<Par={'4','5'}>}DrDist)",/*Special number format*/"qNumFormat": {"qType": "F","qnDec": 2,"qUseThou": 0,"qFmt": "# m"},"numFormatFromTemplate": false}} -
Define the measure axis.
This example shows only labels and uses narrow scale on the measure axis.
"measureAxis": {"show": "labels","spacing": 0.5} -
Define the dimension axis.
This example shows only labels on the dimension axis.
"measureAxis": {"show": "labels","spacing": 0.5},"dimensionAxis": {"show": "labels"}
Result

Complete code example: Using inner and outer dimensions
-
Visualization API
const config = {host: '<TENANT_URL>', //for example, 'abc.us.example.com'prefix: '/',port: 443,isSecure: true,webIntegrationId: '<WEB_INTEGRATION_ID>'};require.config({baseUrl: `https://${config.host}/resources`,webIntegrationId: config.webIntegrationId});require(["js/qlik"], (qlik) => {qlik.on('error', (error) => console.error(error));const app = qlik.openApp('<APP_ID>', config);app.visualization.create('boxplot',[{"qDef": {"qFieldDefs": ["Date.autoCalendar.Date"],"qFieldLabels": ["Date"]}},{"qDef": {"qFieldDefs": ["Date.autoCalendar.Year"],"qFieldLabels": ["Year"]}},{"qDef": {"qLabel": "Driving average","qDef": "Avg({<Par={'4','5'}>}DrDist)","qNumFormat": {"qType": "F","qnDec": 2,"qUseThou": 0,"qFmt": "#,##0 m"},"numFormatFromTemplate": false}}],{"boxplotDef": {"calculations": {"auto": true,"mode": "stdDev","parameters": {"stdDev": 3}},"presentation": {"whiskers": {"show": true}},"sorting": {"autoSort": false,"elementId": "firstWhisker","sortCriteria": {"sortByNumeric": -1}}},"showTitles": true,"title": "Driving average per year","orientation": "horizontal","gridlines": {"auto": false,"spacing": 3},"measureAxis": {"show": "labels","spacing": 0.5},"dimensionAxis": {"show": "labels"}}).then((vis)=>{vis.show("QV01");});});