Configure Qlik Sense Enterprise client-managed
This section shows how to setup the default authentication configuration of Qlik Sense Enterprise client-managed. If other authentication mechanisms are used, the configuration shown here may not be valid.
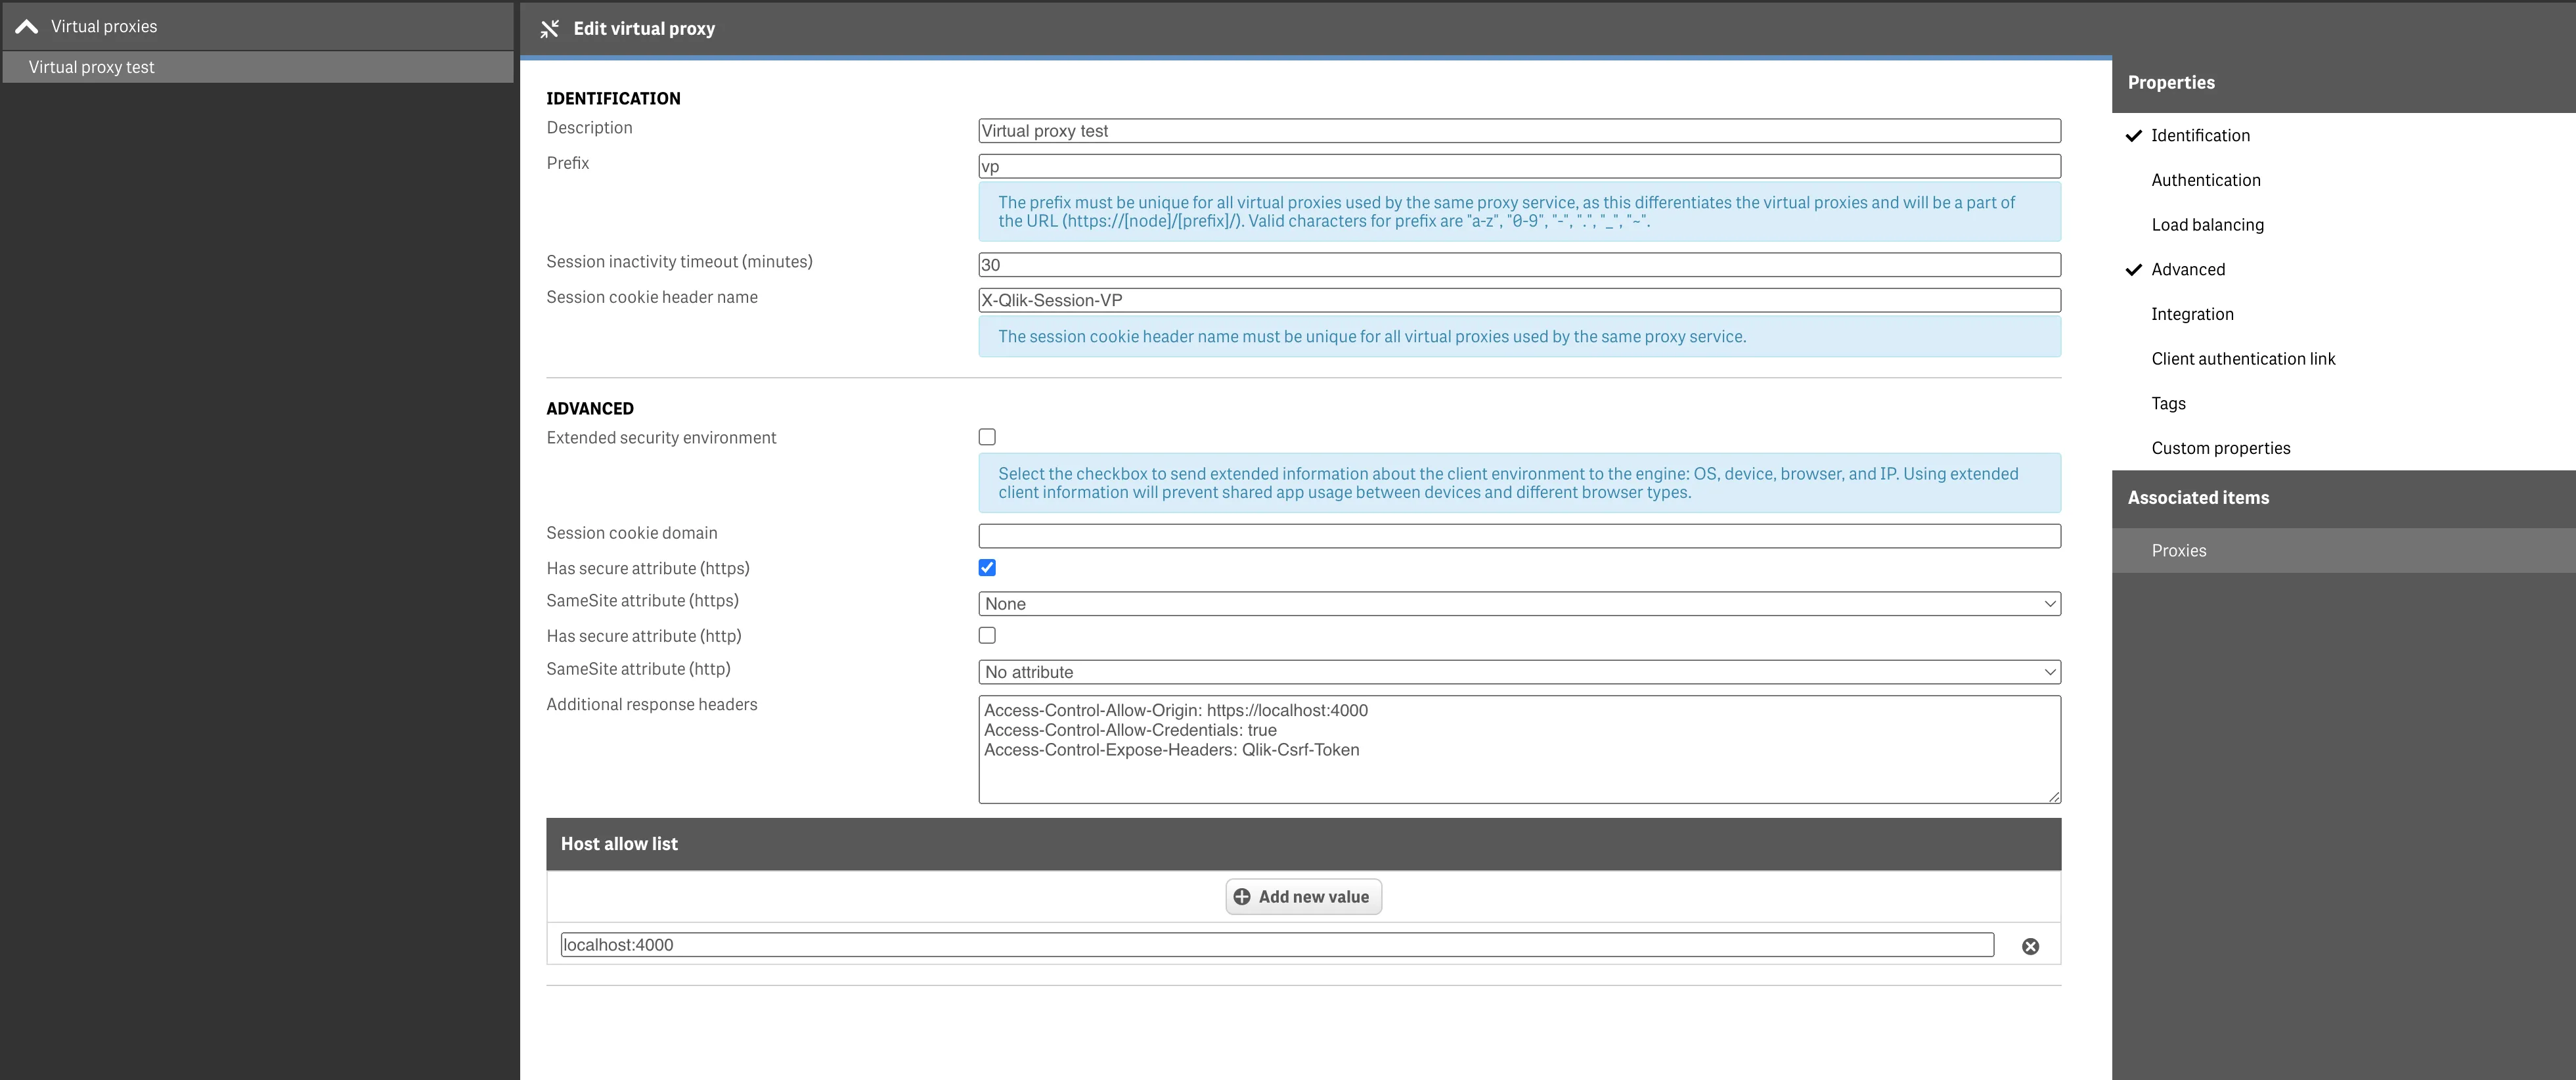
To connect to Qlik Sense Enterprise client-managed with a cross-domain application the following should be configured in the Qlik Management Console:
- Navigate to “Virtual proxies” to configure the virtual proxy that will accept the connection for your embedded app. In most cases, this will be a new virtual proxy, rather than the default virtual proxy that you use for development and site management.
- Select “Advanced” to access the advanced settings.
- Change “SameSite attribute” (for http, https, or both) to “None” .
- Add the following headers to the “Additional response headers” section:
Access-Control-Allow-Origin: https://external-site.com <---- This is the site that connects to Qlik SenseAccess-Control-Allow-Credentials: trueAccess-Control-Expose-Headers: Qlik-Csrf-Token- Add
https://external-site.comto “Host allow list” .
When developing a third-party application that integrates with Qlik Sense, the external cross-domain site is likely from
localhost. The following image shows an example of this setup.
