Create a new tenant with Platform Operations
Create a new tenant
Where a subscription has a multi-tenant entitlement, the region-level OAuth clients can be used to create new tenants.
For more information on how to achieve this via Qlik APIs and toolkits, review the pro-code Create a tenant tutorial.
Requirements
- A Qlik Cloud tenant with access to Qlik Automate.
- A valid region-level OAuth client with access to the tenant which you wish to run the automation against.
- A subscription with a multi-tenant entitlement.
Variables you need to complete this tutorial
sourceTenant: The hostname for your source Qlik Cloud tenant (for example platformoperations.eu.qlikcloud.com).
Configuration
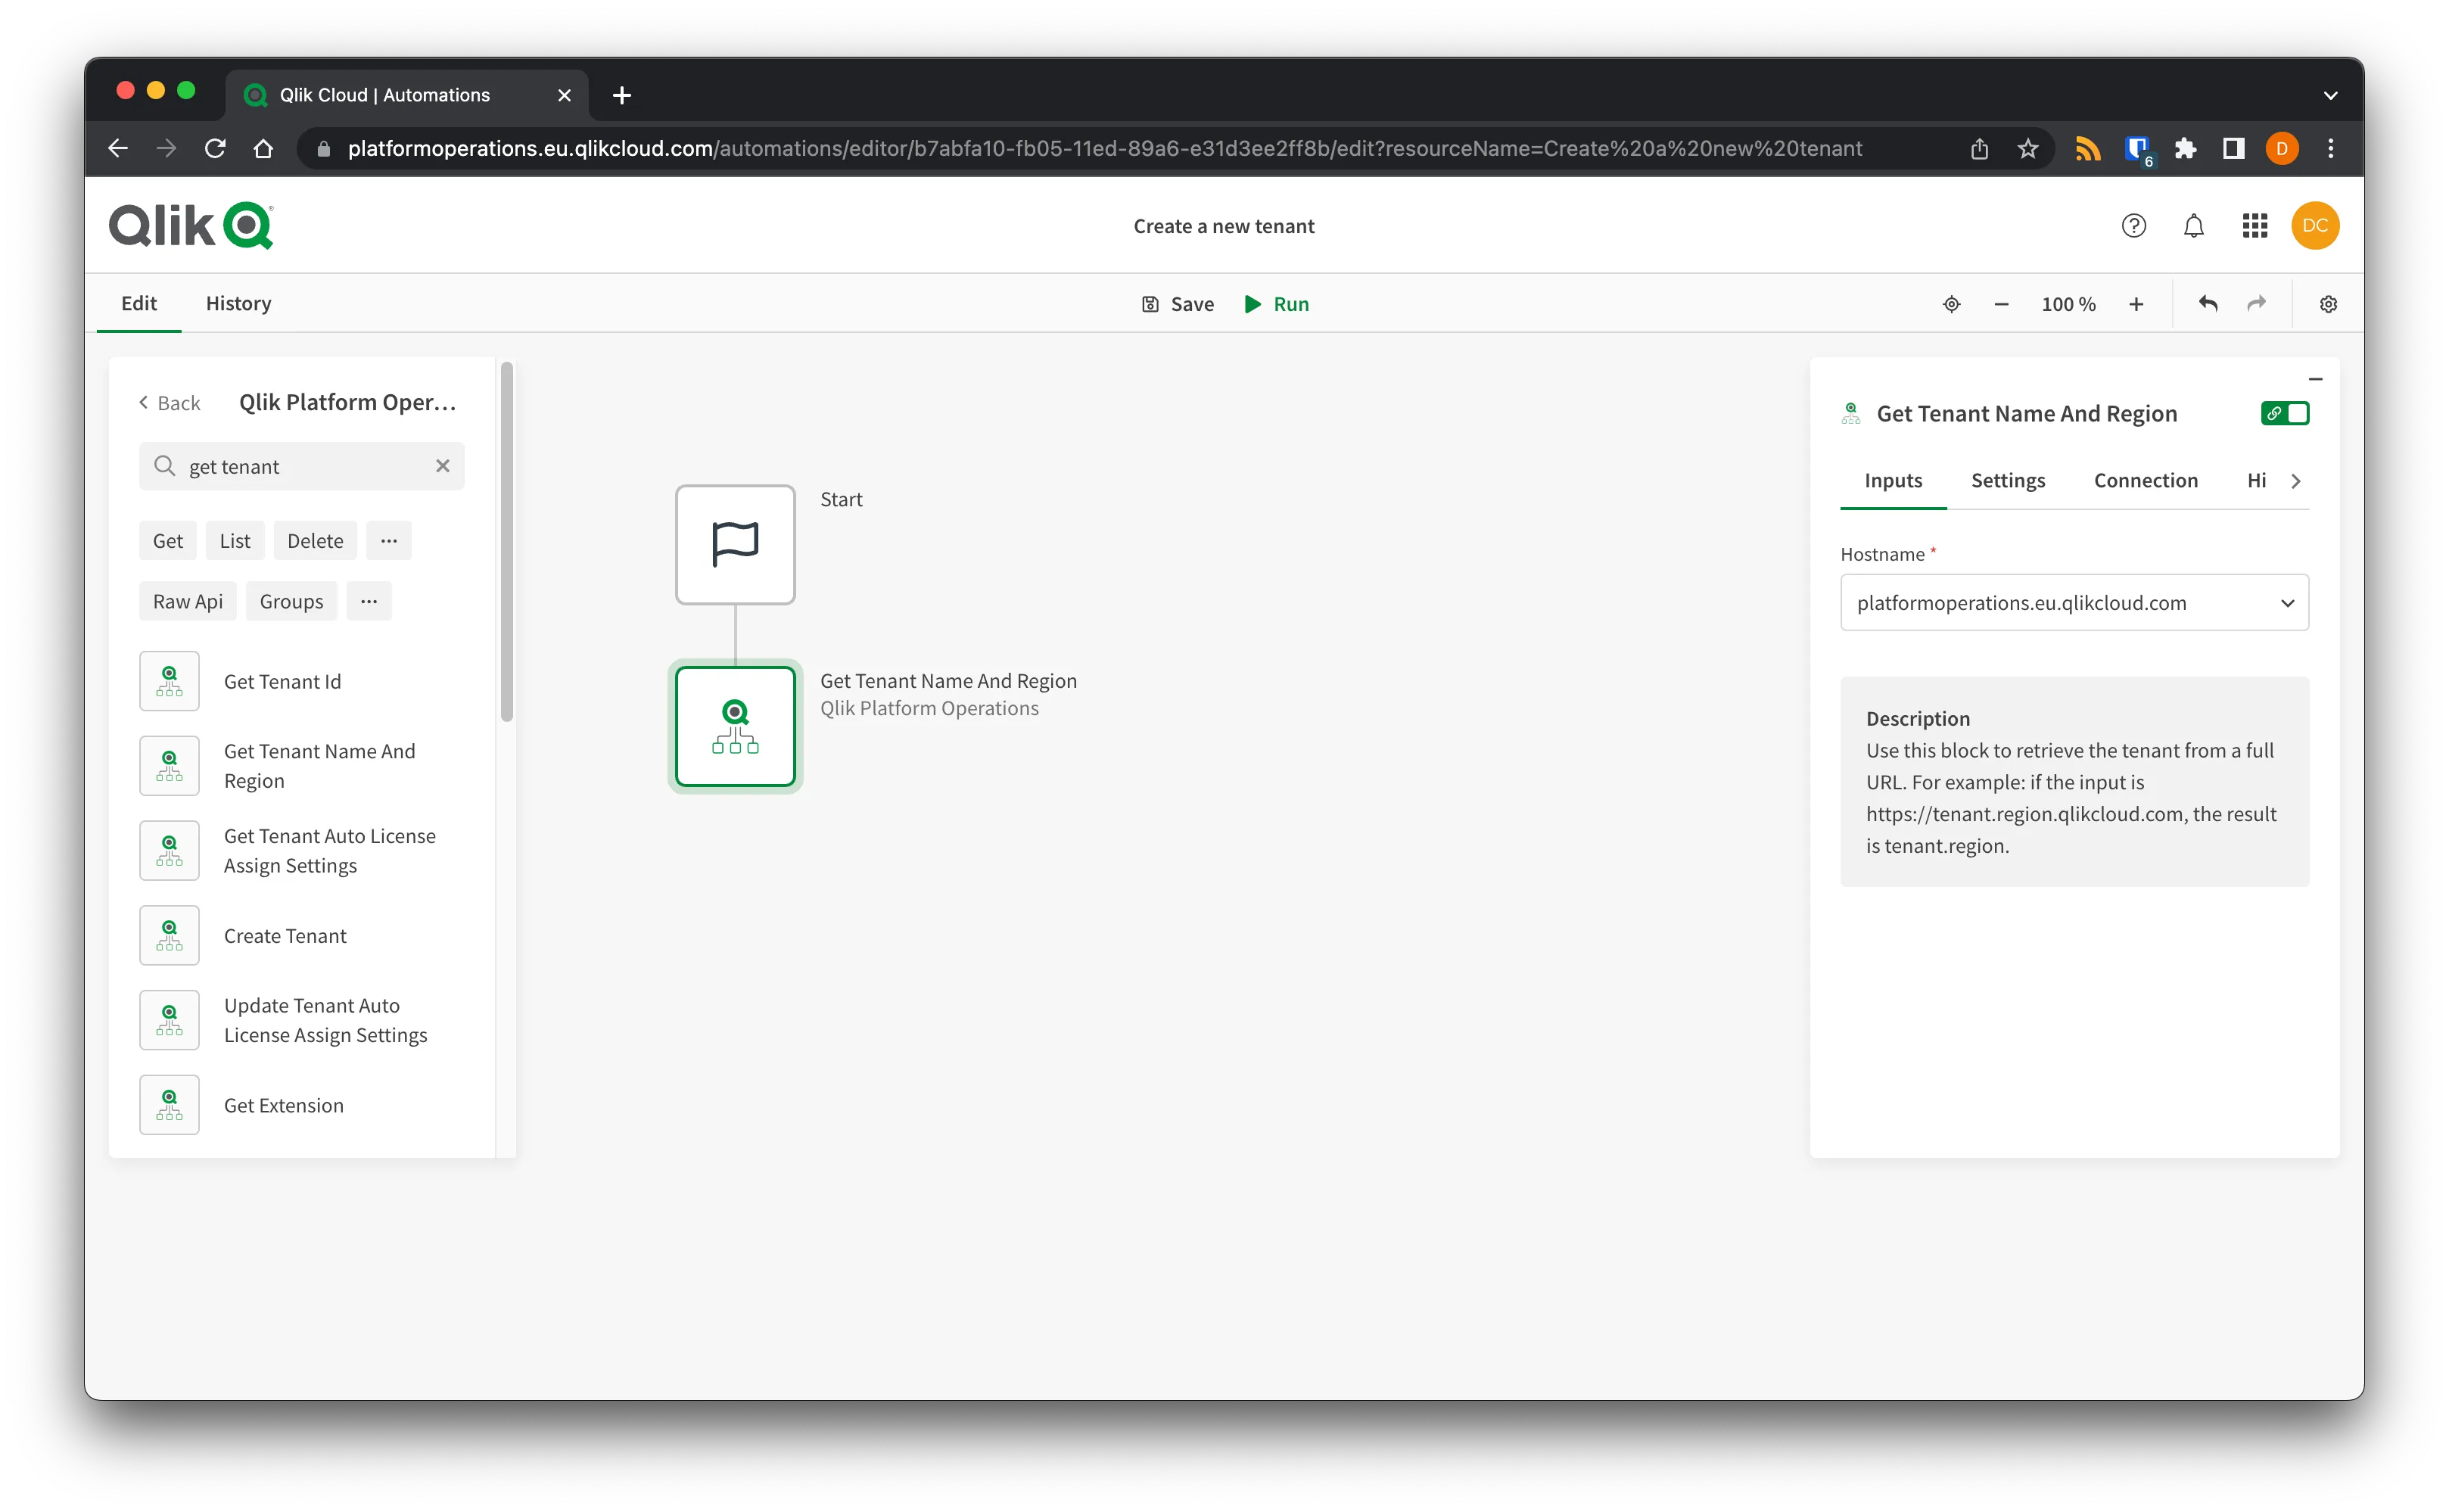
Drag a Get Tenant Name And Region block onto your Start block. This should
be configured with the Hostname set to sourceTenant.
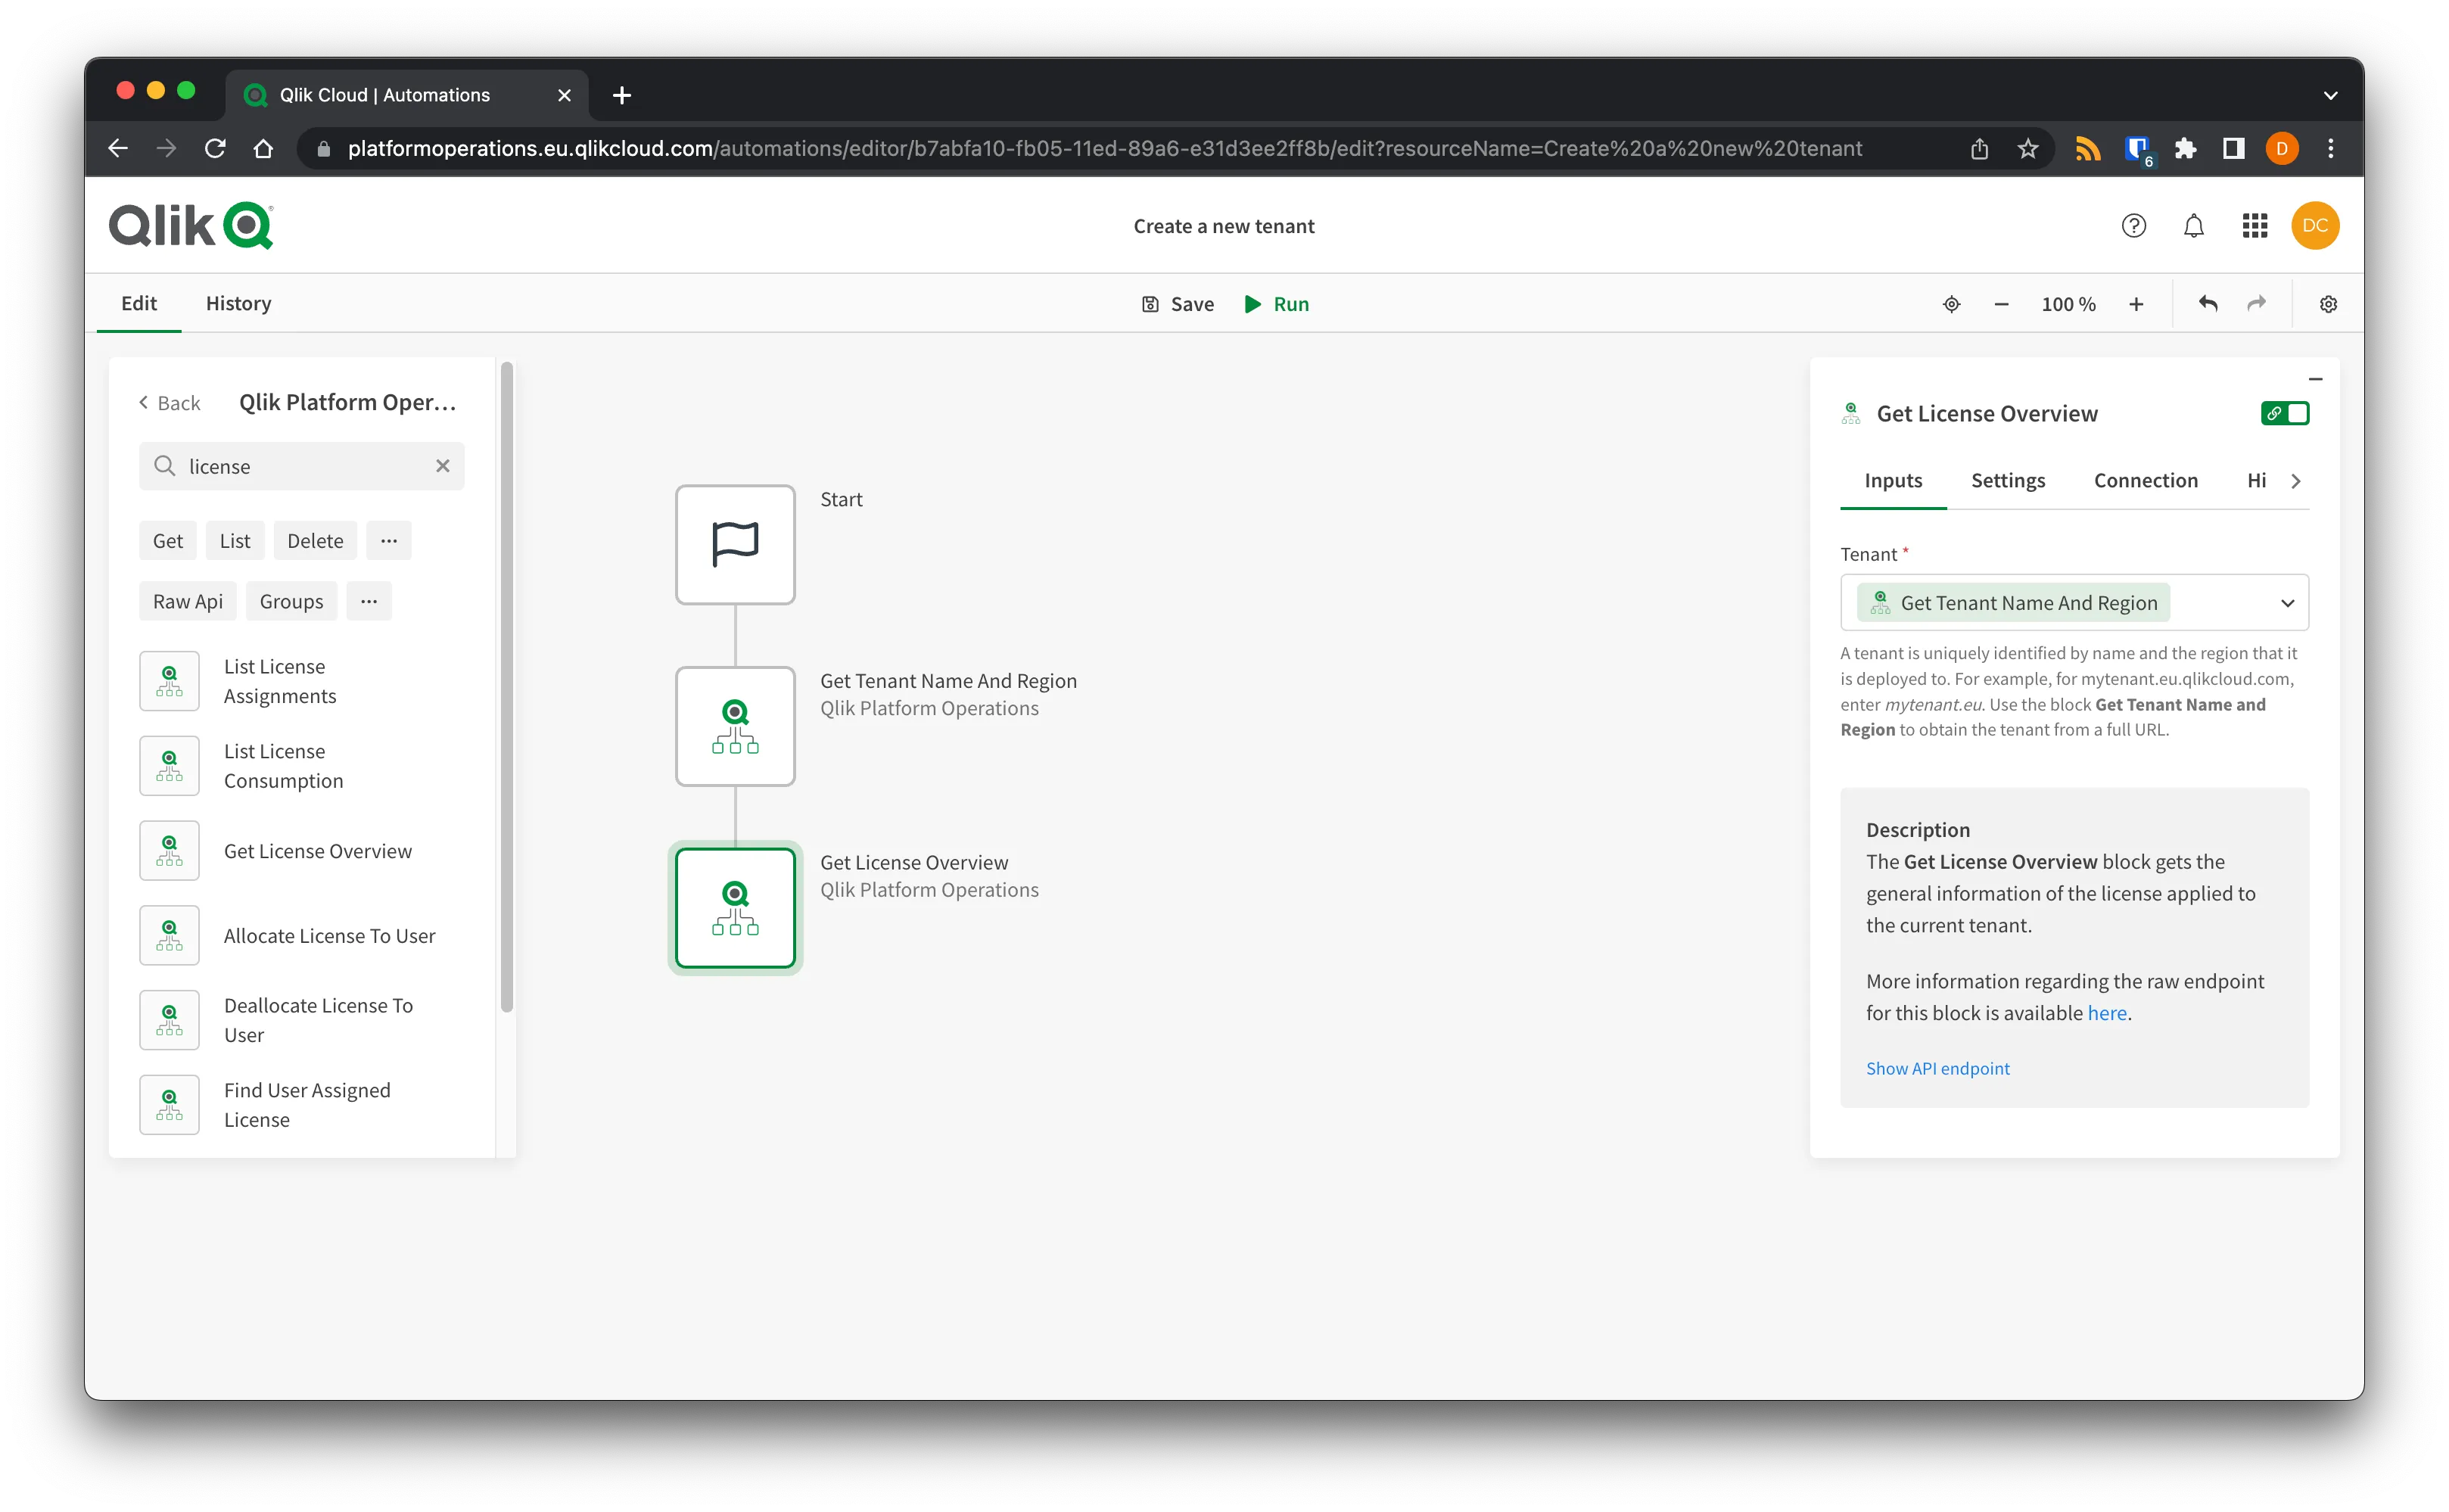
Add a Get License Overview block, and set the Tenant to the Get Tenant Name And Region block. This will retrieve the license information that you need as an input to create a new tenant.
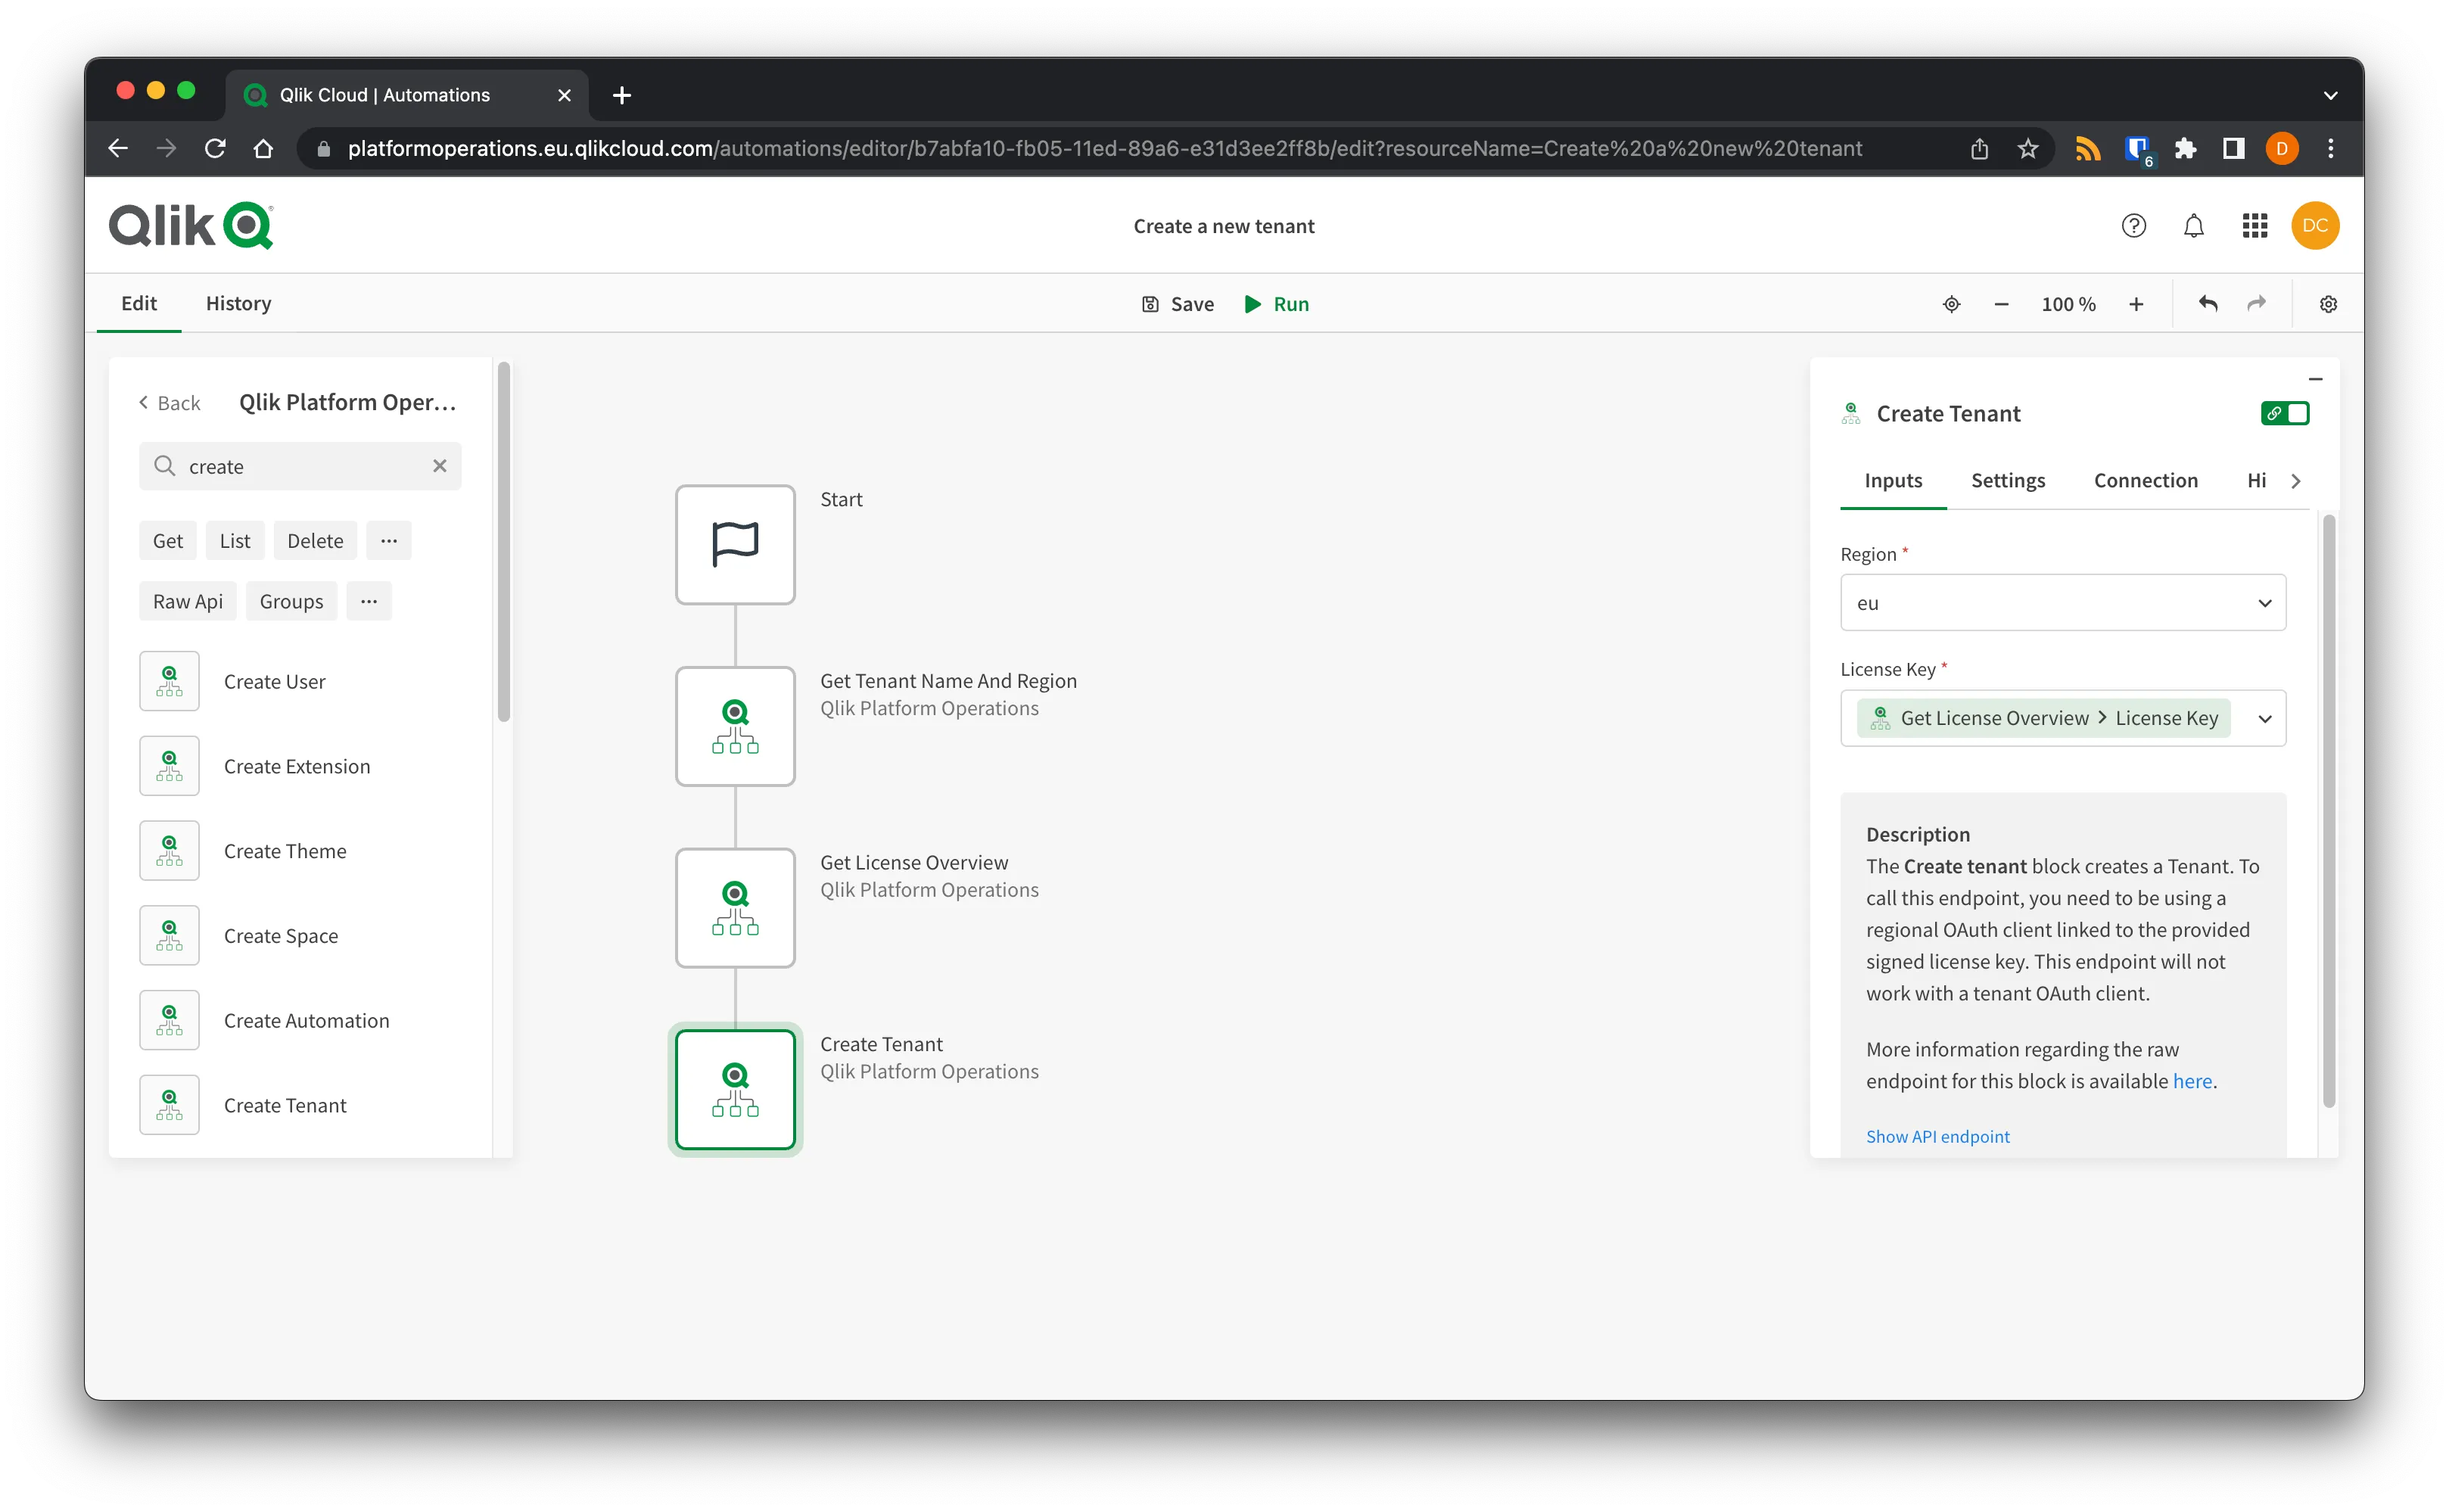
Add a Create Tenant block, setting the Region to the region you wish to create the new tenant in. Set the License Key to the License Key returned from the Get License Overview block.
You must use the corresponding region OAuth client to generate new tenants.
For example, if you wish to create a new tenant in the us region, you should use an
OAuth client generated for the us region.
Add an Output block to output the result from the Create tenant block, and select Run.
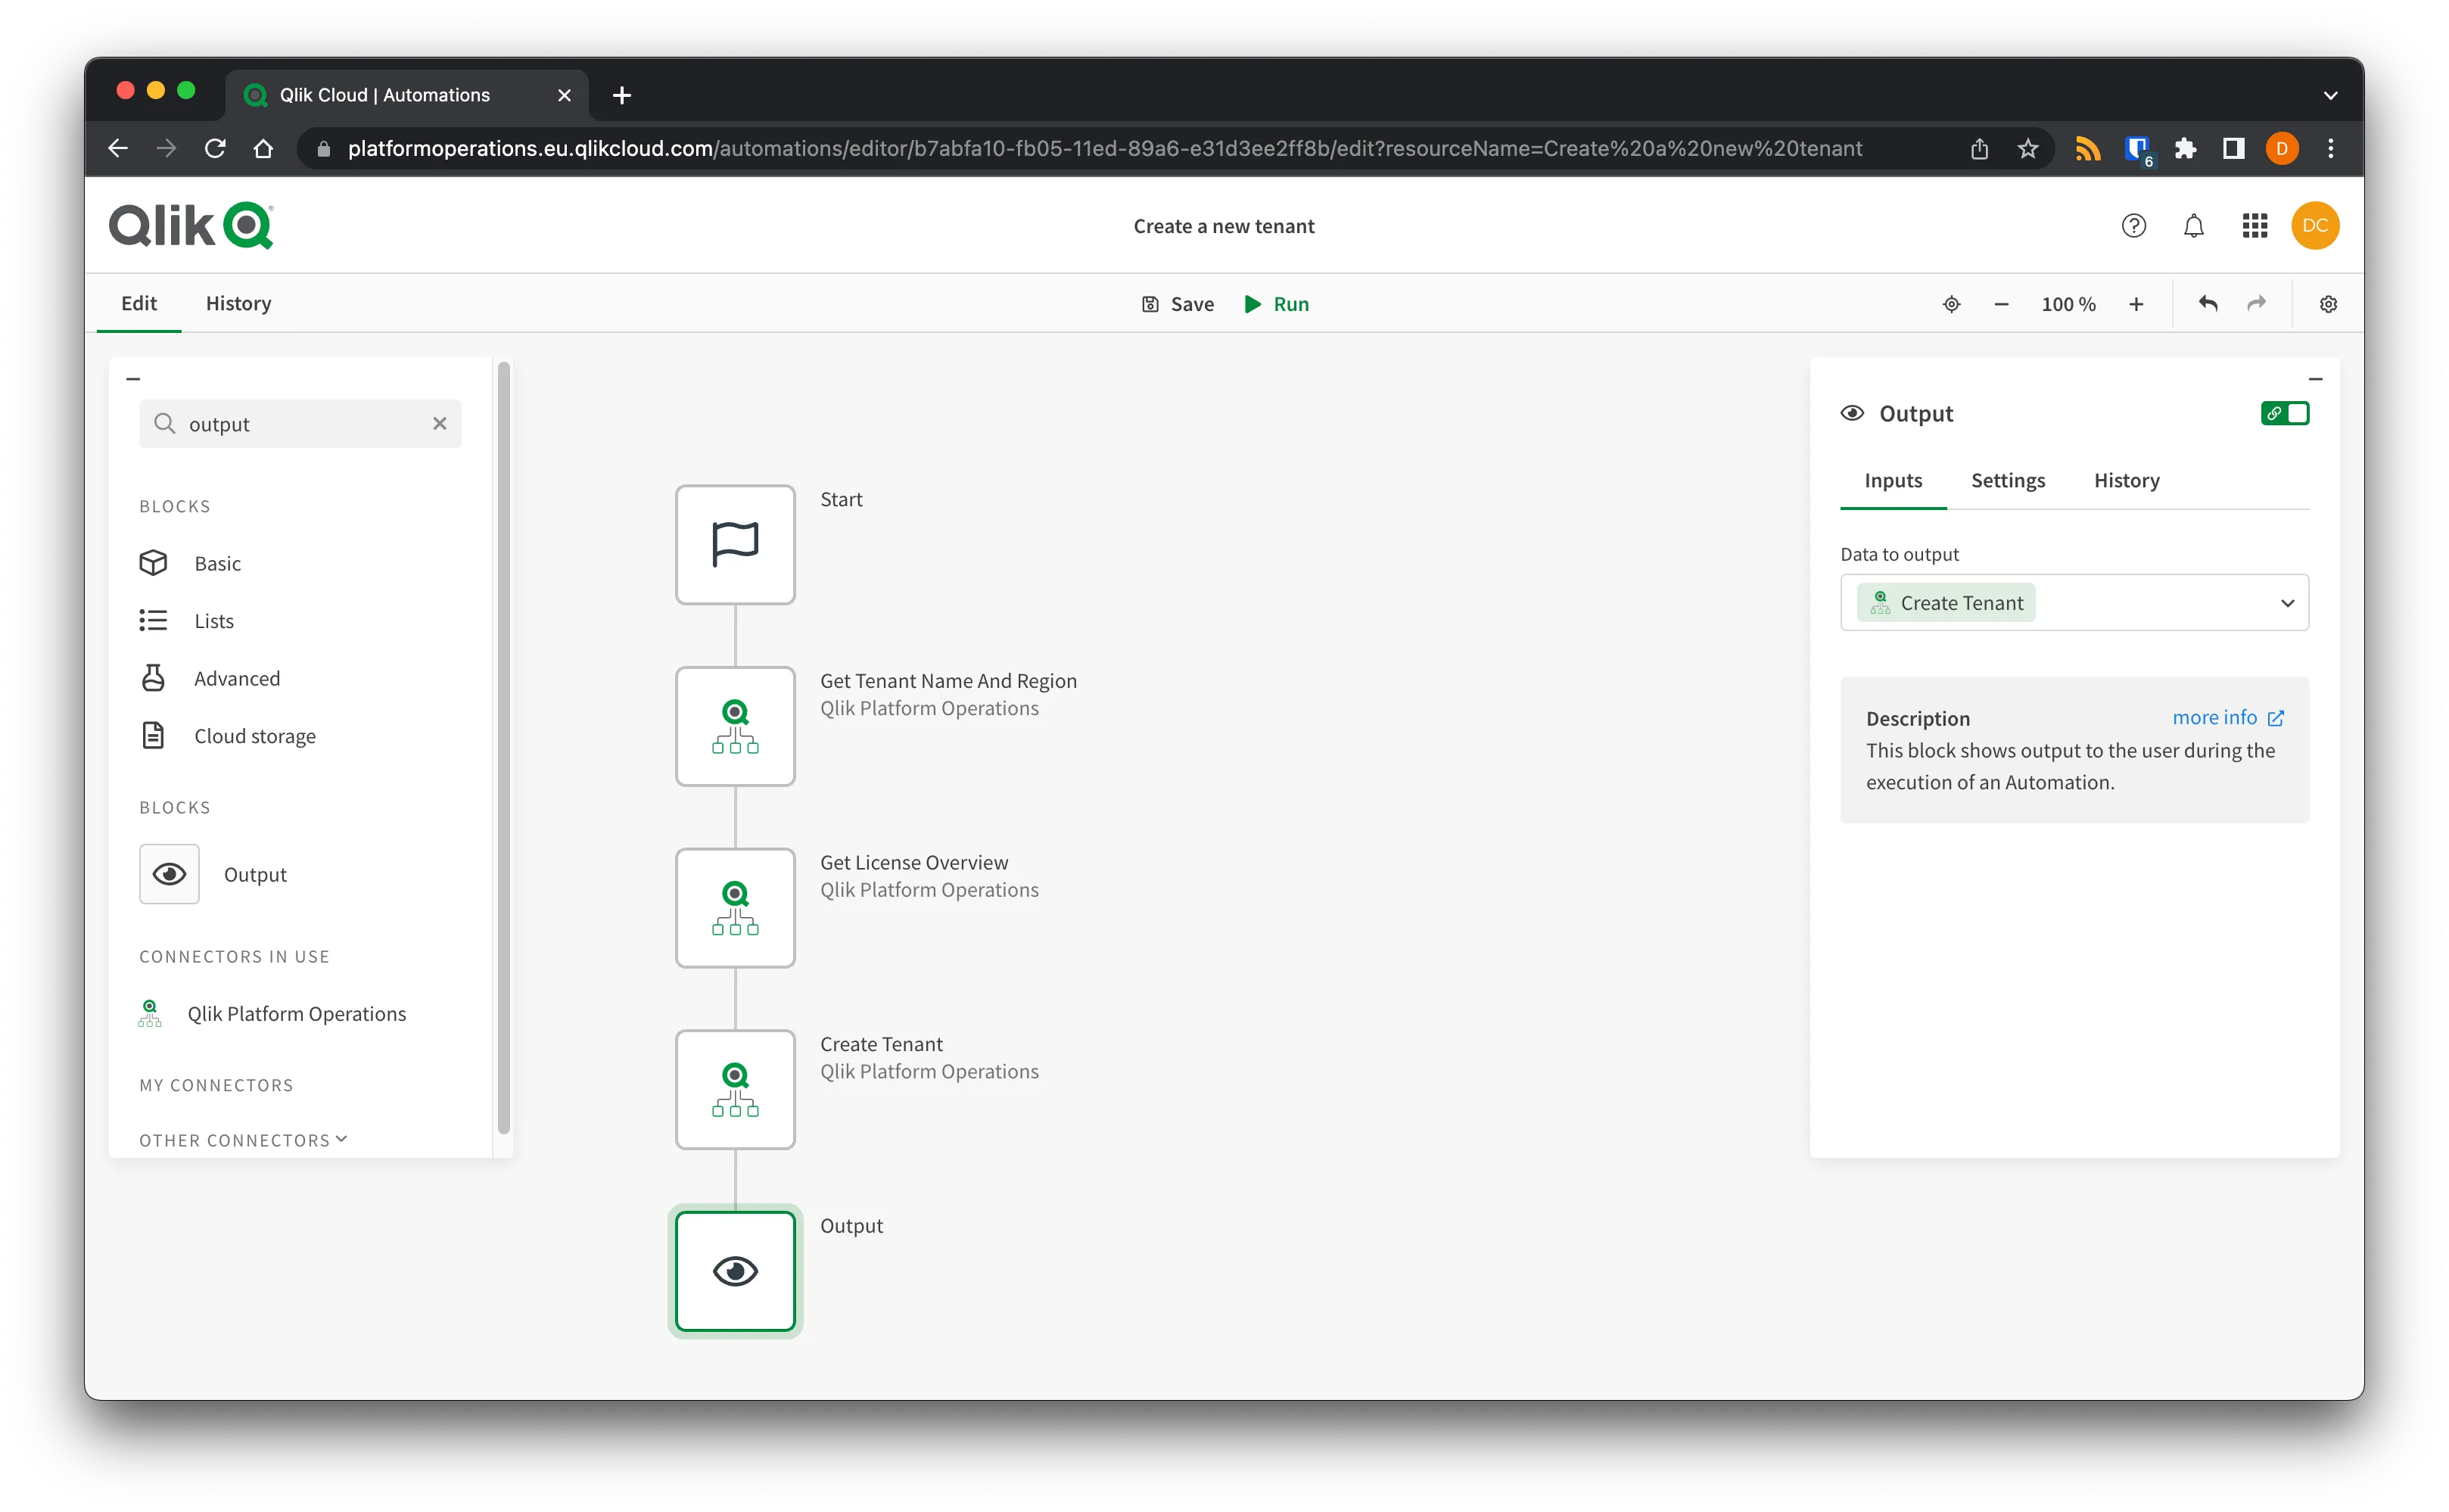
The automation will create a new tenant in the specified region and on the specified subscription.
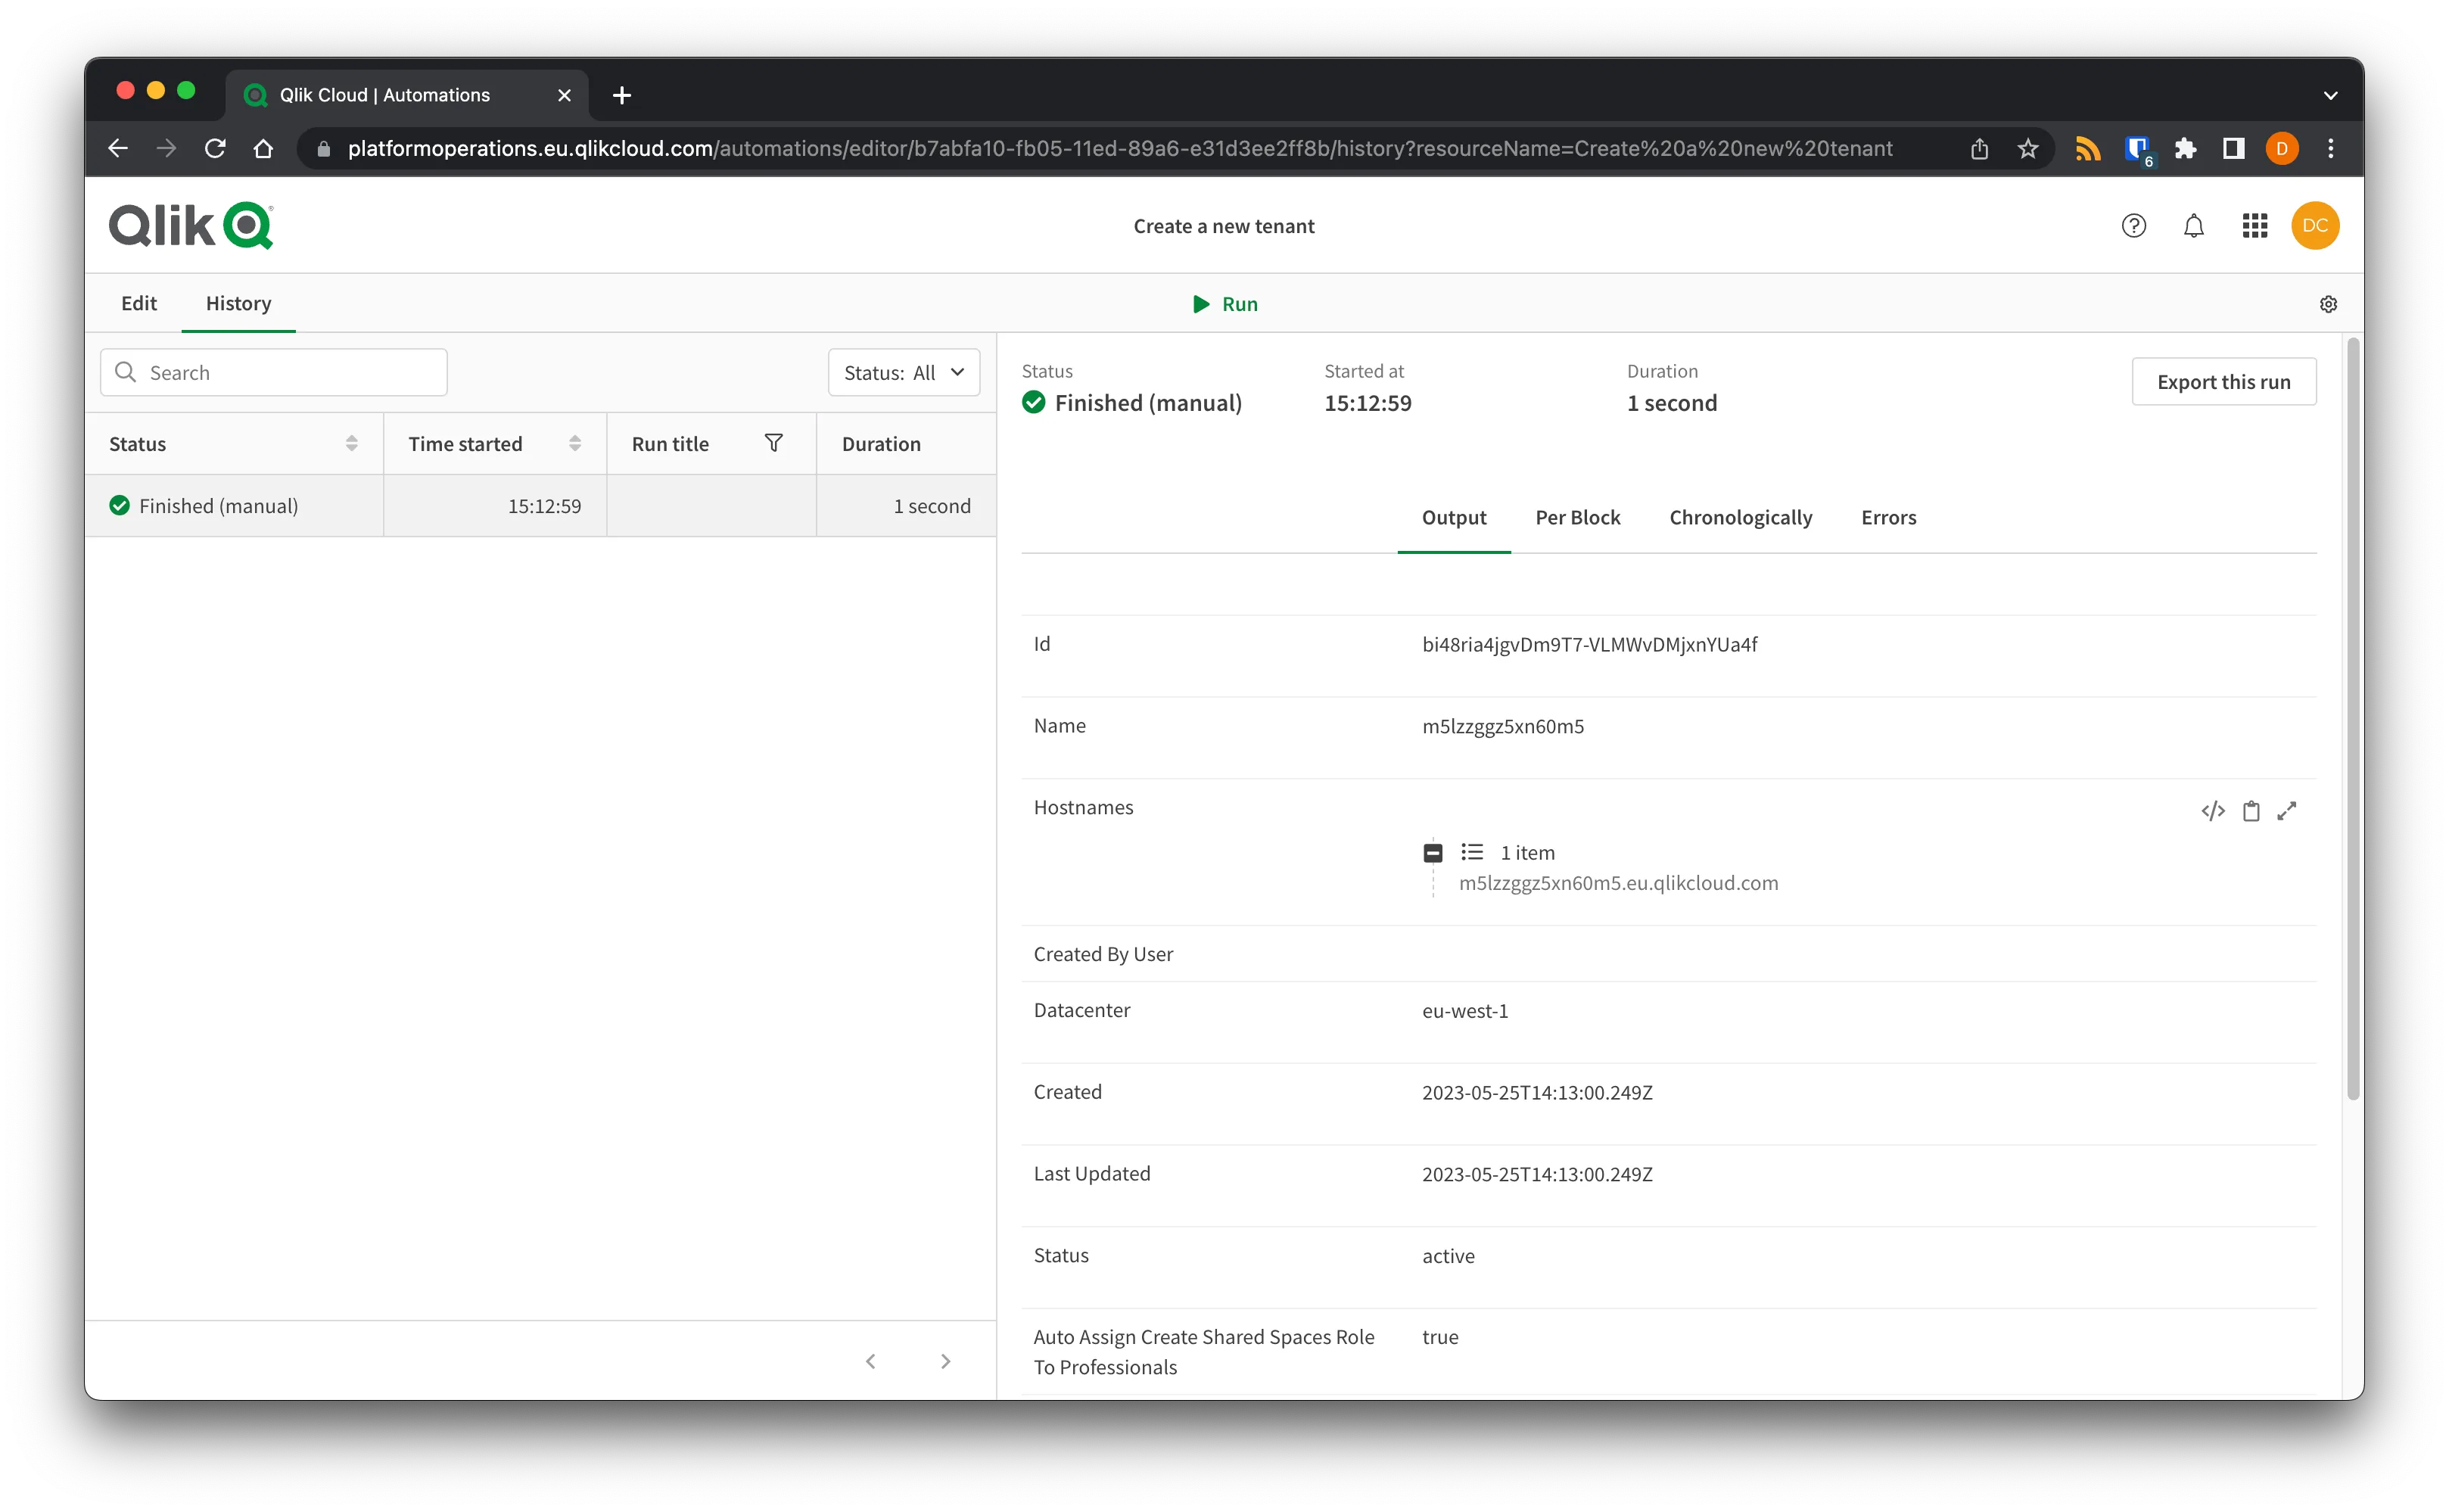
Ensure that you record the Hostnames of the created tenant for future reference.
Full automation snippet
Full automation snippet
To import this snippet to your own automation, either:
- Save as a JSON file, right click the canvas in an automation, and select Upload workspace.
- Copy the snippet to the clipboard, right click the canvas in an automation, and select Paste blocks.
{"blocks":[{"id":"6D7B5E79-AF09-4B70-B286-489B35013AC3","type":"StartBlock","disabled":false,"name":"Start","displayName":"Start","comment":"","childId":"9BA03632-1E82-4642-8568-D32A5627B1C3","inputs":[{"id":"run_mode","value":"manual","type":"select","structure":{}}],"settings":[],"collapsed":[{"name":"loop","isCollapsed":false}],"x":0,"y":0},{"id":"9BA03632-1E82-4642-8568-D32A5627B1C3","type":"SnippetBlock","disabled":false,"name":"GetTenantNameAndRegion","displayName":"Qlik Platform Operations - Get Tenant Name And Region","comment":"","childId":"DBA09423-8054-4046-8DF8-1CFB81351BFA","inputs":[{"id":"575d1740-b1e2-11ed-958a-598edfec33b8","value":"platformoperations.eu.qlikcloud.com","type":"string","structure":[]}],"settings":[{"id":"datasource","value":null,"type":"select","structure":[]},{"id":"blendr_on_error","value":"stop","type":"select","structure":[]},{"id":"automations_censor_data","value":false,"type":"checkbox","structure":[]}],"collapsed":[{"name":"loop","isCollapsed":false}],"x":-270,"y":156,"datasourcetype_guid":"c7e48240-e0f2-11ec-ada1-d5ef75014b77","snippet_guid":"bd5c1ce0-ad14-11ed-83f6-1d42e53790dd"},{"id":"DBA09423-8054-4046-8DF8-1CFB81351BFA","type":"EndpointBlock","disabled":false,"name":"GetLicenseOverview","displayName":"Qlik Platform Operations - Get License Overview","comment":"","childId":"42378885-2D10-4377-830D-EA54EF9AD8DB","inputs":[{"id":"6ee8e9c0-9d78-11ed-9bc8-9be121ac3db0","value":"{$.GetTenantNameAndRegion}","type":"string","structure":[]}],"settings":[{"id":"datasource","value":null,"type":"select","structure":[]},{"id":"blendr_on_error","value":"stop","type":"select","structure":[]},{"id":"cache","value":"0","type":"select","structure":[]},{"id":"automations_censor_data","value":false,"type":"checkbox","structure":[]}],"collapsed":[{"name":"loop","isCollapsed":false}],"x":-286,"y":205,"datasourcetype_guid":"c7e48240-e0f2-11ec-ada1-d5ef75014b77","endpoint_guid":"6ea9fa20-9d78-11ed-a228-a3d1b7dd2e0f","endpoint_role":"get"},{"id":"42378885-2D10-4377-830D-EA54EF9AD8DB","type":"EndpointBlock","disabled":false,"name":"createTenant","displayName":"Qlik Platform Operations - Create Tenant","comment":"","childId":"7FF01836-92B5-4B49-855D-73BEAEBC0491","inputs":[{"id":"349488c0-98c7-11ed-a36c-d756b982108d","value":"eu","type":"string","structure":[]},{"id":"804e0d80-eaff-11ec-9d3c-27c65d22b2cd","value":"{$.GetLicenseOverview.licenseKey}","type":"string","structure":[]}],"settings":[{"id":"datasource","value":null,"type":"select","structure":[]},{"id":"blendr_on_error","value":"stop","type":"select","structure":[]},{"id":"automations_censor_data","value":false,"type":"checkbox","structure":[]}],"collapsed":[{"name":"loop","isCollapsed":false}],"x":-286,"y":363,"datasourcetype_guid":"c7e48240-e0f2-11ec-ada1-d5ef75014b77","endpoint_guid":"dda61e00-e0f2-11ec-a33b-895d4cdc49ef","endpoint_role":"create"},{"id":"7FF01836-92B5-4B49-855D-73BEAEBC0491","type":"ShowBlock","disabled":false,"name":"output","displayName":"Output","comment":"","childId":null,"inputs":[{"id":"input","value":"{ $.createTenant }","type":"string","structure":[]}],"settings":[{"id":"display_mode","value":"add","type":"select","structure":[]}],"collapsed":[{"name":"loop","isCollapsed":false}],"x":-316,"y":207}],"variables":[]}Next steps
Now that you are connected, move on to Adding a user to a tenant.