Migrate apps from Qlik Sense Enterprise Client-Managed to Qlik Cloud
Overview
In this tutorial, you are going to learn how to migrate Qlik Sense applications from Qlik Sense Enterprise Client-Managed to Qlik Cloud, including all private content.
You will use qlik-cli in PowerShell to export Qlik Sense apps from Qlik Sense Enterprise Client-Managed, import them into Qlik Cloud, and then transfer ownership of each object to the correct owner.
The result will be that your users will be able to switch to using Qlik Cloud from Qlik Sense Enterprise Client-Managed with no loss of content or access to their applications and private content.
This tutorial is not exhaustive, and does not migrate other resources such as automations, data alerts, subscriptions, notes, etc. Qlik offers solutions via Qlik Professional Services for complete tenant to tenant migrations.
Prerequisites
To complete this tutorial, ensure that the following prerequisites have been met:
- qlik-cli version 2.24.0 or higher.
- A Qlik Sense app on the source tenant which you wish to move to the target tenant.
- All users who own content in the app should exist in both tenants, with either a common email or subject.
1 Export app from Qlik Sense Enterprise Client-Managed
You will now export the application binary file from Qlik Sense Enterprise Client-Managed.
This snippet requires you to specify some configuration information, specifying which qlik-cli contexts to use, the export app Id and the export path on your local system, and the spaces you wish to deploy the app to in your tenant.
To export all private content from the app, you must specify --exportScope all
when you run the export. You should also ensure that your user has full access to
all objects in the app.
If there is no trusted certificate installed on the system, certificate validation will fail.
Instruct qlik-cli to ignore certificate validation errors by using the --insecure flag.
# Configure variables## Specify qlik-cli context names$cliContextClientManaged = "qsecm"$cliContextSaaS = "qsesaas"## Specify the app to export and the export path$exportAppId = "e43bb92f-3932-4f07-9892-9900e287b528"$exportAppPath = "C:\tmp\"## Specify the spaces to import and publish the app to$targetSharedSpace = "MigrateShared"$targetManagedSpace = "MigrateManaged"
# Select the context for client-managedqlik context use $cliContextClientManaged
# Export the app with all private content (--exportScope all)$exportAppFile = $exportAppPath + $exportAppId + ".qvf"qlik qrs app export create $exportAppId --exportScope all --output-file $exportAppFile --insecure
2 Import the app to Qlik Cloud
You will now import the app to Qlik Cloud, which will result in you owning all objects within the app. This leaves you ready to reassign ownership of each object.
Ensure that you import to a shared space rather than your personal space.
This imported copy will later be moved to a managed space for consumption. To ensure that you also have a copy in the shared space for future development, you will create a copy before you reassign object ownership.
# Select the context for Qlik Cloudqlik context use $cliContextSaaS
# Import the app to Qlik Cloud to a shared space$sharedSpaceId = (qlik space ls --filter $('name co \"' + $targetSharedSpace + '"') | ConvertFrom-Json).id$cloudApp = qlik app import -f $exportAppFile --spaceId $sharedSpaceId | ConvertFrom-Json$cloudAppId = $cloudApp.attributes.id
# Make a copy of the app and move it to the shared space$appCopyId = (qlik app copy $cloudAppId | ConvertFrom-Json).attributes.idqlik app space update $appCopyId --spaceId $sharedSpaceId
3 Export the app metadata from Qlik Sense Enterprise Client-Managed
Certain objects in Qlik Sense apps can be owned by users other than the app owner, and you need to retrieve these users to correctly restore ownership in Qlik Cloud. Since the February 2022 release of Qlik Sense Enterprise Client-Managed, the state of the object (whether it is private, community or base) is stored in the QVF file export, so no additional updates are required for object states.
This snippet lists all the objects that can be reassigned, and retrieves their metadata for the exported app.
Object IDs are unique within an app and remain constant when that app is
duplicated.
In Qlik Sense Enterprise Client-Managed, this ID can be found in the
engineObjectId property, and in objectId in Qlik Cloud.
# Select the context for client-managedqlik context use $cliContextClientManaged
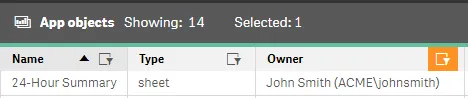
# Retrieve the list of app objects in the exported app from client-managed$appObjects = qlik qrs app object full --filter "app.id eq $exportAppId" --insecure | ConvertFrom-JsonFor example, a private sheet will return the following information about the owner.
//returns an array[ { "id": "58e8858d-6d29-4861-86e4-7263c0365a6d", "createdDate": "2018-11-30T13:25:19.172Z", "modifiedDate": "2018-11-30T13:25:19.172Z", "modifiedByUserName": "ACME\\johnsmith", "owner": { "id": "2a509e7e-c9d1-468b-b19a-9b9ebbe93e74", "userId": "johnsmith", "userDirectory": "ACME", "userDirectoryConnectorName": "ACME", "name": "John Smith", "privileges": null }, ..., "objectType": "sheet", "publishTime": "0000-00-00T00:00:00.000Z", "published": false, "approved": false, ..., "name": "My First Sheet", ... },];4 Change owner of objects in Qlik Cloud
Only the owner of an object, or an OAuth client with the relevant scope
can change the ownership of that object via /v1/apps/{appId}/objects/{objectId}/actions/change-owner.
Assuming the user exists in Qlik Cloud, their user ID will be different to that on Qlik Sense Enterprise Client-Managed. You can look up their user ID in Qlik Cloud using their name, email, or subject.
This example assumes that the user has the same subject in Qlik Sense Enterprise
Client-Managed as their account in Qlik Cloud, in this case: ACME\johnsmith.
First, look up the Qlik Cloud user ID, then if a user is returned, call the endpoint to change ownership for that object.
# Select the context for Qlik Cloudqlik context use $cliContextSaaS
# For each object, retrieve the owner detailsforeach ($i in $appObjects) {
    # Retrieve the object and owner    # If your user subjects in Qlik Cloud don't match directory\userId, use a different approach    $objectId = $i.engineObjectId    $ownerSubject = $i.owner.userDirectory + '\\' + $i.owner.userId
    # Retrieve the user id for the named user    $cloudUser = qlik user ls --filter ('subject eq \"' + $ownerSubject + '\"') | ConvertFrom-Json
    # If there's a user found, reassign    if ($cloudUser.Count -eq 1) {
        # Send request to change owner        $cloudUserId =  $cloudUser.id        $body = '{\"ownerId\":\"'+$cloudUserId +'\"}'        qlik raw post v1/apps/$cloudAppId/objects/$objectId/actions/change-owner --body=$body
    }}
5 Move the app to a managed space
At this point, users will be able to access their content in a copy of the app in a shared space. In most scenarios, you are likely to want users to consume your app in a managed space.
The workflow for “publishing” this app has two steps:
- Ensure that a copy of this app exists in the shared space - you created this copy in step 2.
- Move the original version of the app to a managed space - note that this is not a publish.
By moving the app from the shared to managed space and then setting the copied app as the origin, you preserve the published and approved attributes. A publish would not make any private content available to users.
# Move the original app to a managed space$managedSpaceId = (qlik space ls --filter $('name co \"' + $targetManagedSpace + '"') | ConvertFrom-Json).idqlik app publish create $cloudAppId --moveApp --originAppId $appCopyId --spaceId $managedSpaceIdYou now have your app migrated and all objects available to your users. You should direct users to consume from the published version of the app in your managed space.
6 Remove private content from the app in the shared space
You imported a full copy of the published app from Qlik Sense Enterprise Client-Managed into Qlik Cloud. This app included all private and community content. As with Qlik Sense Enterprise Client-Managed, your development copy of the app should not contain user-created or private content, otherwise on the next publish, you’ll promote this content as base content into the published app.
As such, you should remove this content from the copy of the app left in the shared space. This snippet first unpublishes the community content, then removes all private content from the app.
# Filter the object list to retrieve community objects$appObjectsCommunity = $appObjects | Where-Object {$_.approved -like "false" -and $_.published -like "true" }
# Unpublish community objectsforeach ($i in $appObjectsCommunity) {    if ($i.objectType -eq 'bookmark' -or $i.objectType -eq 'dimension' -or $i.objectType -eq 'measure'){        $objectType = $i.objectType    } else {        $objectType = 'object'    }
    qlik app $objectType unpublish $i.engineObjectId --app $appCopyId}
# Filter the object list to retrieve all private objects$appObjectsPrivate = $appObjects | Where-Object {$_.approved -like "false"}
# Remove private objectsforeach ($i in $appObjectsPrivate) {    if ($i.objectType -eq 'bookmark' -or $i.objectType -eq 'dimension' -or $i.objectType -eq 'measure'){        $objectType = $i.objectType    } else {        $objectType = 'object'    }
    qlik app $objectType rm $i.engineObjectId --app $appCopyId}
Full code snippet
This is the full code snippet from this tutorial.
# Configure variables## Specify qlik-cli context names$cliContextClientManaged = "qsecm"$cliContextSaaS = "qsesaas"## Specify the app to export and the export path$exportAppId = "e43bb92f-3932-4f07-9892-9900e287b528"$exportAppPath = "C:\tmp\"## Specify the spaces to import and publish the app to$targetSharedSpace = "MigrateShared"$targetManagedSpace = "MigrateManaged"
# Select the context for client-managedqlik context use $cliContextClientManaged
# Export the app with all private content (--exportScope all)$exportAppFile = $exportAppPath + $exportAppId + ".qvf"qlik qrs app export create $exportAppId --exportScope all --output-file $exportAppFile --insecure
# Select the context for Qlik Cloudqlik context use $cliContextSaaS
# Import the app to Qlik Cloud to a shared space$sharedSpaceId = (qlik space ls --filter $('name co \"' + $targetSharedSpace + '"') | ConvertFrom-Json).id$cloudApp = qlik app import -f $exportAppFile --spaceId $sharedSpaceId | ConvertFrom-Json$cloudAppId = $cloudApp.attributes.id
# Make a copy of the app and move it to the shared space$appCopyId = (qlik app copy $cloudAppId | ConvertFrom-Json).attributes.idqlik app space update $appCopyId --spaceId $sharedSpaceId
# Select the context for client-managedqlik context use $cliContextClientManaged
# Retrieve the list of app objects in the exported app from client-managed$appObjects = qlik qrs app object full --filter "app.id eq $exportAppId" --insecure | ConvertFrom-Json
# Select the context for Qlik Cloudqlik context use $cliContextSaaS
# For each object, retrieve the owner detailsforeach ($i in $appObjects) {
    # Retrieve the object and owner    # If your user subjects in Qlik Cloud don't match directory\userId, use a different approach    $objectId = $i.engineObjectId    $ownerSubject = $i.owner.userDirectory + '\\' + $i.owner.userId
    # Retrieve the user id for the named user    $cloudUser = qlik user ls --filter ('subject eq \"' + $ownerSubject + '\"') | ConvertFrom-Json
    # If there's a user found, reassign    if ($cloudUser.Count -eq 1) {
        # Send request to change owner        $cloudUserId =  $cloudUser.id        $body = '{\"ownerId\":\"'+$cloudUserId +'\"}'        qlik raw post v1/apps/$cloudAppId/objects/$objectId/actions/change-owner --body=$body
    }}
# Move the original app to a managed space$managedSpaceId = (qlik space ls --filter $('name co \"' + $targetManagedSpace + '"') | ConvertFrom-Json).idqlik app publish create $cloudAppId --moveApp --originAppId $appCopyId --spaceId $managedSpaceId
# Filter the object list to retrieve community objects$appObjectsCommunity = $appObjects | Where-Object {$_.approved -like "false" -and $_.published -like "true" }
# Unpublish community objectsforeach ($i in $appObjectsCommunity) {    if ($i.objectType -eq 'bookmark' -or $i.objectType -eq 'dimension' -or $i.objectType -eq 'measure'){        $objectType = $i.objectType    } else {        $objectType = 'object'    }
    qlik app $objectType unpublish $i.engineObjectId --app $appCopyId}
# Filter the object list to retrieve all private objects$appObjectsPrivate = $appObjects | Where-Object {$_.approved -like "false"}
# Remove private objectsforeach ($i in $appObjectsPrivate) {    if ($i.objectType -eq 'bookmark' -or $i.objectType -eq 'dimension' -or $i.objectType -eq 'measure'){        $objectType = $i.objectType    } else {        $objectType = 'object'    }
    qlik app $objectType rm $i.engineObjectId --app $appCopyId}