Migrate an existing visualization extension to nebula.js framework
This guide walks you through how to migrate a Qlik Sense visualization extension from the AngularJs-based extension API to nebula.js, the framework-agnostic visualization SDK. Through this tutorial, you are going to learn about the benefits nebula.js brings to bear working with modern front-end frameworks.
To understand the overall migration process, you need to take an existing visualization extension that has already been developed using the Extension API like the one below. The extension is a Scatter-Pie plot that allows to visualize each scatter plot’s bubble as a pie-chart to understand the Sales-Profit correlation for the three categories state-wise as shown below:

The motivation is to recreate the exact same visualization by leveraging the novel nebula.js framework.
Traditional Extension API-based visualizations need JavaScript code (.js), a
metadata file (.qext) and stylesheets (.css). The logic of the extension is
controlled using the code in the JavaScript file and so that is the entry point
for your development activity. In the nebula.js approach, the various modules
of the code are segregated to align it to a modular architecture, thus
providing greater flexibility to the developers. The following sections walk
through the steps required to migrate an existing extension.
Step 1: Create a Nebula project structure
The first step is to get all the files required as part of developing the extension. You need to use the nebula.js CLI like below and structure the project.
npx @nebula.js/cli create hello --picasso noneThe --picasso none option tells the command to not create a picasso
visualization template, other options are minimal and barchart.
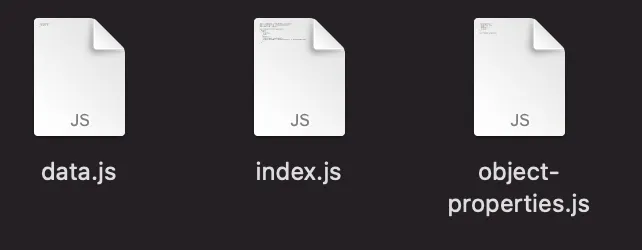
Executing the preceding command, gives the three required files.
Step 2: Starting the local development server
One of the advantages of using the nebula.js framework is that it comes with a local development server that allows developers to see their output as they code. To start the server, execute the following command.
cd hellonpm run start
Now, you need to connect to Qlik’s Analytics Engine using the WebSocket protocol. Once the connection is established, a list of apps is presented to test the visualization in the Developer UI.
Step 3: Configuring the data structure
The next step is to configure the data structure and define the hypercube as shown in the below code snippet below. This is precisely similar to what is present in the current extension(Extension API). However, all this information is saved under one single JavaScript file in the older approach. In Nebula the default properties (object-properties.js) is split from the extension (property panel) definition (ext.js).
object-properties.js:
const properties = {  showTitles: true,  qHyperCubeDef: {    qInitialDataFetch: [{ qWidth: 6, qHeight: 100 }],  },

export default properties;
ext.js:
export default function ext(/* galaxy */) { return { definition: { type: "items", component: "accordion", items: { dimensions: { uses: "dimensions", min: 1, max: 6, }, measures: { uses: "measures", min: 2, max: 2, }, sorting: { uses: "sorting", }, settings: { uses: "settings", }, }, }, support: { snapshot: false, export: true, sharing: false, exportData: true, viewData: true, }, };}galaxy contains environment specific inputs. For more information, see Load an extension into Qlik Sense.
The next thing that is done differently here in Nebula framework is to add
the /qHyperCubeDef as a data target in data.js like this:
export default { targets: [ { path: "/qHyperCubeDef", }, ],};Step 4: Import packages
nebula.js is built on the concept of custom hooks. If you do not know what
hooks are, this tutorial
can give you a high-level idea of how to leverage them in terms of Nebula.
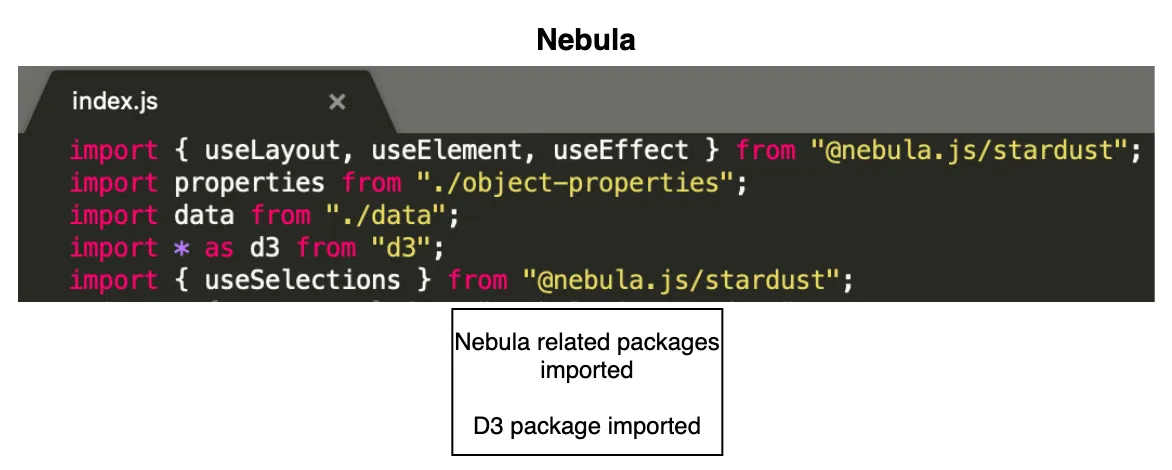
As per the get started with Nebula extension tutorial,
two essential packages are required to be imported to access the
Qlik Sense object’s layout and render the data. They are useLayout and useEffect.
Also, since the current visualization extension is built using D3.js, D3 needs
to be installed in the NodeJS environment and the package imported. To do that,
use the below commands.
-
Install D3 by running
npm install d3 --save -
Import D3 to
index.jsby addingimport * as d3 from d3
Now, to understand what was done differently here in the nebula.js framework as compared to the Extension API, see below.

As seen from the comparative analysis, the primary difference is that the Extension API uses RequireJS to load resources asynchronously and has a jQuery wrapper around the HTML element. In the nebula.js framework, these dependencies are eliminated, thereby making it framework agnostic and faster.
Step 5: Code Logic
The important goal here is to develop the main capability of the extension. Again, the whole idea here is to replicate the exact visualization developed using Extension API without investing additional time in rewriting the source code. The entry point for the extension’s code is the index.js file, and currently, it looks like below with all the necessary packages.
import { useLayout, useElement, useEffect } from "@nebula.js/stardust";import properties from "./object-properties";import data from "./data";import * as d3 from "d3";
export default function supernova(galaxy) {  return {    qae: {      properties,      data,    },    ext: ext(galaxy)    component() {      const element = useElement();      element.innerHTML = "<div>Hello!</div>"; // eslint-disable-line    },  };}
Now, take a look at the current extension’s JS code:

To render the visualization with an HTML element, the paint($element, layout)
method is used where $element is a jQuery wrapper containing the HTML element
and layout presents the data and properties for the visualization. This method
is called every time the visualization is rendered. So, is there a similar
approach in the nebula.js framework? The answer is Yes.
Take a look at the index.js file. Here, the function supernova() consists
of the component() method, which is where all the rendering takes place.
To render something, the DOM element to which the visualization is assigned
needs to be accessed, and to do so, the useElement method is used. Also, as
mentioned in Step 4, to access the QS object’s layout and bind the data, the
useLayout and useEffect methods needs to be leveraged. These three methods
is all that is needed to migrate the current code to the newer framework
successfully.
After copying the current code and aligning it to Nebula’s programming standard, the code looks like this:
export default function supernova() {  return {    qae: {      properties,      data,    },    component() {      const element = useElement();      const layout = useLayout();      const selections = useSelections();      console.log(layout);      //getting data array from QS object layout      useEffect(() => {        if (layout.qSelectionInfo.qInSelections) {          return;        }        var qMatrix = layout.qHyperCube.qDataPages[0].qMatrix;
        var measureLabels = layout.qHyperCube.qMeasureInfo.map(function (d) {          return d.qFallbackTitle;        });
        //an array that invokes each row of qMatrix from layout:        var data = qMatrix.map(function (d) {          return {            Dim1: d[0].qText,            Dim2: d[1].qText,            Dim3: d[2].qText,            Dim4: d[3].qText,          };        });        var width = 1000;        var height = 400;        var id = "container_" + layout.qInfo.qId;        const elem_new = `<div id=${id}></div>`;        element.innerHTML = elem_new;        viz(data, measureLabels, width, height, id);      }, [element, layout]);    },  };}
As seen, most of the code lines are similar to what was present in the
Extension API. The only difference lies in the way the interaction happens with
the three methods here in nebula.js. In the end, the viz() method is called
within the component() function, and that is where the D3.js code for the
visualization is. Again, this is similar to what was done in the Extension API.
Step 6: Build & Deploy
The good old extensions developed using Extension API had to be bundled (zipped) together with a .qext file, a JavaScript file, and any other dependency files. nebula.js presents a modern way of building and preparing the extension to be deployed to the Qlik Sense environment. Firstly, since Nebula runs in a NodeJS environment, it is easy to bundle everything and distribute the visualization as a Node Package using -
npm run buildSecondly, to deploy the extension to a QS environment, the below command is
used, which generates all files into the folder /hello-ext, that you can then
use as an extension in QS.
npm run senseNow that you understand what’s involved in migrating existing extensions to the nebula.js framework, here’s a recap of the key benefits:
- nebula.js is modular and allows developers greater flexibility in programming and code maintenance.
- It comes with a local development server to visualize the output as the code is run.
- Modern framework with no dependency on module loaders such as RequireJS or wrappers like jQuery.
- Available as a Node package and hence easy to get started with.
- Faster build and deployment; visualizations can be distributed as Node packages.
- Way forward—support, etc.
If you want to get started with nebula.js or build advanced visual representations using the SDK, here are some additional resources:
- Building a Hello world extension using Nebula
- Why to stop using Capability APIs?
- Building an advanced visualization extension using nebula.js and third-party libraries such as D3.js
- Dealing with variables in a Mashup using nebula.js & enigma.js
This wraps up the tutorial. Hopefully, this can serve as a helpful starting point for developers and organizations planning to migrate their existing visualizations to Nebula.