Make your visualization extension dynamic
This section will describe how to change the behavior by configuring the properties panel making it possible to define the text displayed.
Building the basic properties panel
It should be possible to use and configure your visualization extensions in the same manner as standard Qlik Sense charts. You can define which properties are exposed to the end users in the properties panel and you can add additional custom properties that can be used in your code.
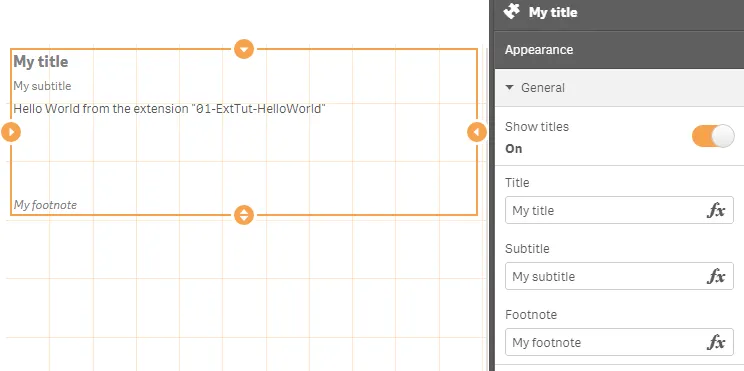
If you look at the output of the visualization extension, the properties pane
will look like the following image. The Appearance accordion is enabled by
default and it is available out of the box.

To create a text box where the rendered output can be defined, as an addition to the Appearance accordion, you need to add another object to the main script file: definition.
        return {        // Define what the properties panel look like        definition: {        },        //Paint resp.Rendering logic        paint: ( $element, layout ) => {
        }    };
You can define what the properties panel should look like inside definition. This basically defines the accordion with the sections and components to be used.
return { // Define what the properties panel look like definition: { type: "items", component: "accordion", items: { appearancePanel: { uses: "settings" } } },The line uses: "settings" defines that the reusable component settings should
be used. The settings component is the same as the Appearance accordion.
Adding the text definition box
To add a text box into the Appearance accordion, use the following code.
definition: { type: "items", component: "accordion", items: { appearancePanel: { uses: "settings", items: { MyStringProp: { ref: "myDynamicOutput", type: "string", label: "Hello World Text", defaultValue: "Hello world" } } } } },Here is a short explanation of the preceding code:
- MyStringProp is the representation of the new custom object
- ref defines the name to reference the new property in the code
- label is used for displaying the label preceding the text box
- type defines the type definition, in this case, you want to have a string returned
- defaultValue defines the default value of the text box
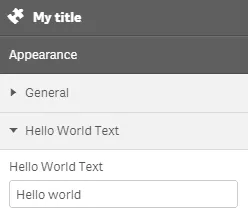
This is what the properties panel should look like:

Using the custom string property
The next step is to modify the code so it renders what is entered in the text box that you just added. But first you add a console output to verify where to find the object to reference in your code.
paint: ( $element, layout ) => { //put this at the beginning of the paint method console.log( layout );Then you change from the hard-coded result:
$element.empty(); const $helloWorld = $( document.createElement( 'div' ) ); $helloWorld.html( 'Hello World from the extension "05-ExtTut-HelloWorld"<br/>' ); $element.append( $helloWorld );to the dynamic by using layout.myDynamicOutput:
$element.empty(); const $helloWorld = $( document.createElement( 'div' ) ); $helloWorld.html( layout.myDynamicOutput ); $element.append( $helloWorld );After saving and reloading Qlik Sense Desktop, this is what it looks like:

If you make changes to ref, refreshing the browser will not display the changes.
In this case, you need to delete the existing visualization from the sheet and then add it again.
As a best practice, verify the returned properties using console.log().
Complete code example
(Click to expand this section)
define( [  'jquery'  ],  ( $ )=>{    'use strict';
    return {      //Define what the properties panel looks like      definition: {        type: "items",        component: "accordion",        items: {          appearancePanel: {            uses: "settings",            items: {              MyStringProp: {                ref: "myDynamicOutput",                type: "string",                label: "Hello World Text",                defaultValue: "Hello world"              }            }          }        }      },
      //Paint resp.Rendering logic      paint:  ( $element, layout ) => {        $element.empty();        const $helloWorld = $( document.createElement( 'div' ) );        $helloWorld.html( layout.myDynamicOutput );        $element.append( $helloWorld );      }    };   });